Jump to content

15 Screenshots

  • Like 21
  • Voron FTW! 14
  • Thanks 2

Recommended Comments


18 minutes ago, Matei said:

It might just be my objective eye. I don't necessarily want to do more changes right now but if you make them, I'll have them for when I can experiment a bit, so don't do it if you don't want to.

Fair enough, I think I will aim for the update so I can include all of the improvements together.

Link to comment
Share on other sites

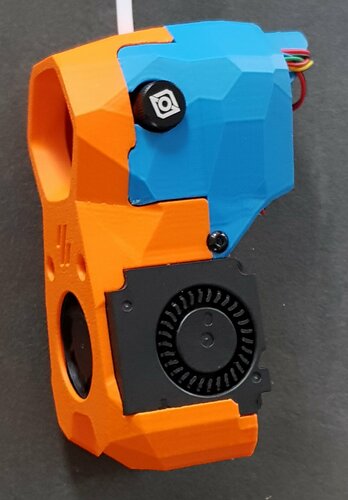
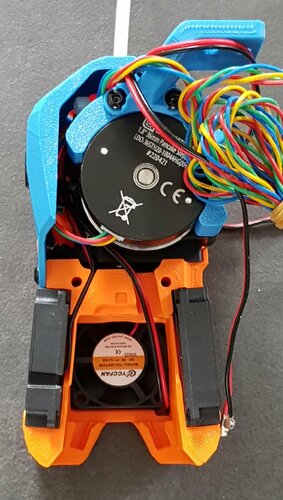
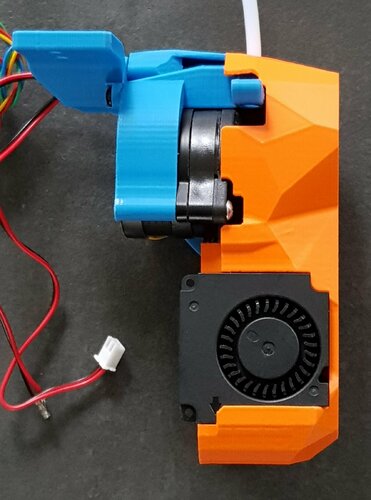
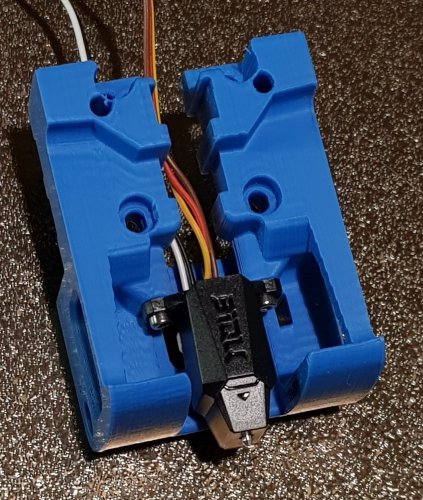
Did a test fit and it went very well! Thank you very much sir. 

  • Bambulab TZ2.0 hotend with high flow nozzle
  • Mellow fly halo
  • Zero click 
  • GDS 3010/4010
  • LDO Filament sensor
  • EBB36 (still in shipment)


PXL_20231025_124108596.jpg

PXL_20231031_160732662.jpg

PXL_20231031_160727241.jpg

  • Like 1
Link to comment
Share on other sites
1 hour ago, nitronaf said:

Did a test fit and it went very well! Thank you very much sir. 

  • Bambulab TZ2.0 hotend with high flow nozzle
  • Mellow fly halo
  • Zero click 
  • GDS 3010/4010
  • LDO Filament sensor
  • EBB36 (still in shipment)


PXL_20231025_124108596.jpg

PXL_20231031_160732662.jpg

PXL_20231031_160727241.jpg

Looks great! Thanks for sharing.

Link to comment
Share on other sites

Is there a way to search this threads on here? I am unhappy with zeroclick and would like to build a boop but I cant find the damn comment with the files. 

Link to comment
Share on other sites
10 minutes ago, nitronaf said:

Is there a way to search this threads on here? I am unhappy with zeroclick and would like to build a boop but I cant find the damn comment with the files. 

Yeah sorry, it is a little hard to find. My Boop beta 4 was a couple pages back. It combines their two front pieces into one and then you would need the official Boop rear piece.

Link to comment
Share on other sites
15 hours ago, nitronaf said:

Is there a way to search this threads on here? I am unhappy with zeroclick and would like to build a boop but I cant find the damn comment with the files. 

The search box has a dropdown where you can select what to search in. I get 14 results on Boop for this comment thread.

Screenshot 2023-12-04 062611.png

  • Like 5
Link to comment
Share on other sites
33 minutes ago, lawlietzz said:

Hi, i need to mount Orbiter2.0 with MGN12.

Do you have a file?

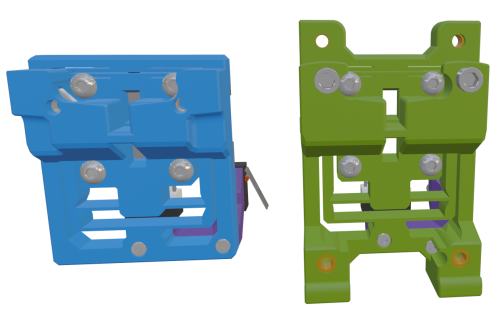
The x-frame_right/left are for the front facing MGN12 on a Trident or 2.4. There are different versions depending on which probing system you are using. The basic one shown here is for an Omron TL-Q5MC2-Z inductive probe or will fit a Klicky setup.

2023-12-11-132138_1914x1048_scrot.thumb.png.b874e39ffb605f4ff391276ba3113a5c.png

Link to comment
Share on other sites
On 7/16/2023 at 6:07 AM, atrushing said:

This should work. It is for the Bambu hotend, the Orbiter 2.0 with filament sensor, Mellow Fly-Halo and the ZeroClick mount point. The separate ZeroClick mount piece is in the main downloads.

2023-07-16-120151_1920x1054_scrot.thumb.png.33ff6f147ca04eccdc3e3f81838c296d.png

[a]_Mini_Stealth_Orb_2.0_FilSensor_Bambu_FlyHalo_ZeroClick.stl 722.35 kB · 14 downloads

Would you happen to have a version of this without the Mellow Fly-Halo?

Link to comment
Share on other sites

My Micron+ build will include a Rapido 2 HF, Orbiter 2.0 with filament sensor and a Knomi display, using Boop for probing. Which of your models will suit this setup? I am a bit lost. Is there anything I forgot to mention that is important for the toolhead selection?

Link to comment
Share on other sites
2 hours ago, Jen Salik said:

My Micron+ build will include a Rapido 2 HF, Orbiter 2.0 with filament sensor and a Knomi display, using Boop for probing. Which of your models will suit this setup? I am a bit lost. Is there anything I forgot to mention that is important for the toolhead selection?

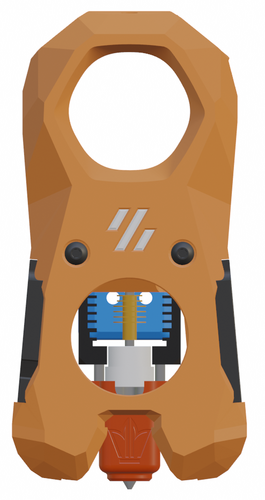
So, this is the latest Boop front piece that I've posted for the Mini Stealth but it will need some support.

Below is a new shroud for the Orbiter 2.0 + filament sensor + Rapido + Knomi 1. Some of the other parts you might need are the LED_carrier and diffuser, motor_bridge, Umbilical PCB mount or cable_chain_mount. I don't think I have a motor bridge for the Orbiter that would fit around the filament sensor. I believe some people just use standoffs to support the PCB behind the stepper.

[a]_Mini_Stlb_Orb_2.0_Rapido_Knomi_filament_sensor.stl

  • Like 1
Link to comment
Share on other sites

Hi, gorgeous design, I really love the look of stealthburner, but it's s'gosh darn huge. I'm not a fan of the other mini stealthburner options for orbiter v2 since they lack the (now superfluous) part cooling fan shroud up top.

I want to put the mini stealth I've printed onto my 2.4, but I want to retain TAP. I've read through the comments on this 'file' and have seen the discussions regarding TAP and understand the issues related to fitment and tapping force, etc.

I've been following the tapchanger project, and got very excited when I noticed that it uses the dragonburner (with support for the V0.2's ministealthburner, stealthburner and experimental support for rapidburner).

I've got the tap changer carriage printed and almost complete, and was hoping to bolt up the mini stealth to the mount for the ministealthburner, but the upper screws are slightly mis-aligned (the mounting points for the ministealthburner tapchanger mounts are set a mm or two further apart). I should be able to modify the mount in fusion360 to accommodate the spacing for the upper screws, and it looks like the lower screws are viable, I just need to add some threaded inserts to the part cooling ducts (or maybe even just use nuts...).

Since I know nothing about blender, or working with meshes in general really, I've been trying to convert your design into a solid body, with limited success.

I started a 1 month free trial with pro fusion360, to use their prismatic "convert mesh" tool. It's given good results so far, but it's been a lot of trial and error. I think the trouble is with the 'face groups'. When I try to just run the tool it fails, but when I run it with face groups created it gets pretty close. The biggest issues are with the fillets. Fusion has trouble deciding which triangles should be part of which face groups. I've gotten better and better results by having it do a 'worse' job of creating the face groups (this results in more face groups that I can then combine to make facegroups that more accurately represent the faces), but it's been kinda slow going.

My aim is to get a solid body version of mini stealth, so that I can modify it to mount to a tapchanger mount. (and/or use that solid body as a starting point for a tapchanger mount). I do have a solid version just from the stl. It's got like 10,000+ faces so it will be tricky to modify, but I should be able to use it to build off of.

After writing all this I just found a comment on your dab project stating that you're working to release mini stealth v2... Maybe I should wait for that, this version is so awesome that the next is sure to be worth the wait.


How is development of v2 coming? Is it also designed in blendr?

Is there any simple way, or is it feasible, for you to send/upload a version of mini stealth without fillets? (I'll keep learning what I can about blendr, maybe I can figure that part out)


Anyway, sorry for the novel, thank you for mini stealth. Please let me know if there's anything I can help with from a solid modelling perspective, or if you have any suggestions for my little side project of Mini Stealth - Tapchanger integration.

face groups.png

solid backside.png

solid front.png

Screenshot 2024-02-21 at 12.36.08 PM copy.jpg

Screenshot 2024-02-21 at 12.36.18 PM copy.jpg

  • Like 1
Link to comment
Share on other sites
3 hours ago, alwaysmohawk said:

I've got the tap changer carriage printed and almost complete, and was hoping to bolt up the mini stealth to the mount for the ministealthburner, but the upper screws are slightly mis-aligned (the mounting points for the ministealthburner tapchanger mounts are set a mm or two further apart)

Yet another rabbit hole for me to fall into.. The TapChanger looks quite interesting, especially as a multi-color option. The Mini Stealth was adapted from the Mini Afterburner which had 26mm spacing for the two mounting screws. They changed this to 25mm with the release of the Mini Stealthburner. I will try assembling a TapChanger inside Blender to get a better idea of how the Mini Stealth could fit it.

3 hours ago, alwaysmohawk said:

My aim is to get a solid body version of mini stealth, so that I can modify it

This is a 'fun' challenge that I gave up on. @Ducky4546 spent some time on this and the results are pretty clean. He shared a link to the fusion file and I'm pretty sure it is for the Orbiter 2.0. It almost might be easier to line up a .step of the original Stealthburner with the Mini Stealth mesh and scale it down by 62.5%. Then you could chip away at the Stealthburner with regular solid operations..

3 hours ago, alwaysmohawk said:

How is development of v2 coming? Is it also designed in blendr?

Yes and yes.. Here is a link to where I've described the current progress on the Mini Stealth v2. The parts that I am still working on are all extruder specific and tend to take longer than the shrouds where I can just copy/paste geometry. I am currently building/validating a toolhead around a Hummingbird extruder (LGX Lite mounting) and it has taken me a couple days just getting the filament release lever working.

20240221_204201.thumb.jpg.d9048f295f8aee34ef671c9e53418809.jpg

You can see that the shroud is separated from the extruder and hotend which makes the assembly a lot easier. I hope it might make mods easier as well. I am attaching an .stl file of the v2 Core piece for a Dragon hotend because that should be easier to work with in Fusion. There is also a blank v2 Shroud without any extruder cutouts applied. The shroud has new part cooling ducting and requires air guides glued into the 4010 blowers.

Mini_Stealth_v2_Core_Orb2.0_Dragon.stl Mini_Stealth_v2_Shroud_blank.stl

  • Like 2
Link to comment
Share on other sites
On 2/21/2024 at 6:37 PM, alwaysmohawk said:

I've got the tap changer carriage printed and almost complete, and was hoping to bolt up the mini stealth to the mount for the ministealthburner, but the upper screws are slightly mis-aligned

I am modifying all of the Core pieces and Shrouds to be compatible with 25 or 26mm hole spacing mounts but the TapChanger will still collide with the blower fans of the Mini Stealth. The blowers even interfere with the lower screw holes that interface with the lower bearings of the TapChanger shuttle.

2024-02-24-155622_507x845_scrot.thumb.png.cf687bcf38cd7890fdfd6b109fb9134c.png

I think the only way for the Mini Stealth to work with the TapChanger would be to add a 5mm spacer between them but that wouldn't help the rigidity of the setup.

Edit: I checked the Dragon Burner version of the TapChanger and it almost fits but the Mini Stealth blowers are still in the way but now for the center pair of bearings on the shuttle.

2024-02-24-164208_833x869_scrot.thumb.png.b8a856ae09bff5a6d791a26a65862255.png

Edited by atrushing
Link to comment
Share on other sites

Thanks for sharing the files and updates, more beautiful work! It looks like the shroud just magnets on? Crazy idea but: have you considered doing magnetic connectors for the shroud? If I knew how to blendr, or could get a very good solid mini stealth file I'd toss a few hours at it to see if it's workable, but boy that would be neat! You could get away with 4 pins I think, +5, +24, gnd, data (pixel)

Screenshot2024-02-25at1_35_54PM.png.8b979af08c3624daf498a4e65e09ef0f.png


I see what you mean about the interference with the tapchanger mounts. I had even considered just standoff-style spacers, even just for poc. I don't hate the idea of a big solid spacer plate though, I think with sufficient top/bottom/walls and infill it will have minimal effect on rigidity, especially with CF (or, the strangely harder to find, GF) ABS. The Stealthburner (full size) mount seems to be essentially just that, a spacer stuck onto the tapchanger mount.

Screenshot2024-02-25at1_22_59PM.png.ffd62c7277bf94e7df369dda4ba96482.pngScreenshot2024-02-25at1_23_04PM.png.f562cf490f1160c09f19fbd3c0797f94.png

I'm currently using TAP with full Stealthburner on my 2.4, and the rigidity is... acceptable for my use case. The value of tap (direct bed probing, zero concern about offset, nozzle length, build plate thickness etc, and less complexity from clicky/auto-z offset etc) is worth the rigidity tradeoff.

Not sure what parts you have laying around, but I've got orbiter 2.0 and dragon HF (not exactly exotic) and would be happy to help with any testing.

Can I contribute to the Mini Stealth 2.0 release by buying you some beer/coffee to say thanks? In any case, thank you again for your work and for sharing it so openly with the community. IMO Mini Stealth is the best looking toolhead rn.

  • Like 1
  • Thanks 1
Link to comment
Share on other sites
1 hour ago, alwaysmohawk said:

Crazy idea but: have you considered doing magnetic connectors for the shroud?

This would make a nice and clean connection but it looks like they would be too deep to put the pair of connectors on the front of the core piece and it would get in the way of the status neopixel.

2024-02-25-211553_825x920_scrot.thumb.png.ad94f865e3a98d1d13f07dd73d59be1c.png

Here you can also see the guide rails that interact with the core. From the toolheads I have been assembling, it seems that the magnets aren't really needed but I guess that would depend on printer tolerances. With your idea in mind though, I think I will hack a spare magnetic USB-C cable I have laying around and see if I can get something working.

Magnetic-USB-C.jpg.490a4bfa55a6317dd0a7cde6cd5255f4.jpg

I don't really want to have a group of male/female connectors inside of the shroud for the three fans and the LEDs. I could use a small USB-C breakout board (or design one in KiCad) to allow easier removal of the shroud for maintenance. The extruder, thermistor and extruder wires are easy enough to route normally or to an umbilical board. It would need 6 wires in [24V + 5V + GND + part_cooling_negative + hotend_fan_negative + LED_signal] that would connect to 9 wires on the shroud.

1 hour ago, alwaysmohawk said:

The Stealthburner (full size) mount seems to be essentially just that, a CHONKY spacer stuck onto the tapchanger mount.

That looks like the case. Worth looking into further. I really need to release the Mini Stealth v2 before I get too distracted though.

1 hour ago, alwaysmohawk said:

The value of tap

This is why I need to work more on my DAB probe.. I hope I will be able to get it compatible with all of the extruder options for the Mini Stealth. It is just difficult fitting things with such a compact toolhead.

2 hours ago, alwaysmohawk said:

Can I contribute to the Mini Stealth 2.0 release by buying you some beer/coffee to say thanks?

I would appreciate any support!

Link to comment
Share on other sites
On 12/11/2023 at 7:29 PM, atrushing said:

The x-frame_right/left are for the front facing MGN12 on a Trident or 2.4. There are different versions depending on which probing system you are using. The basic one shown here is for an Omron TL-Q5MC2-Z inductive probe or will fit a Klicky setup.

2023-12-11-132138_1914x1048_scrot.thumb.png.b874e39ffb605f4ff391276ba3113a5c.png

Where can I find this file?


image.thumb.png.caef600606d35d2e7deb788f8ad96560.png

  • Like 1
Link to comment
Share on other sites
4 hours ago, lawlietzz said:

Where can I find this file?

When I finish that configurator it should spit out a list like this for your inputs:


[a]_Mini_Stealth_Orb_2.0_Dragon-Rapido_UHF_v1.2.4.stl
Cable_door_Orbiter_2.0.stl
status_LED_carrier.stl
status_LED_logo_diffuser.stl
Motor_bridge_frame_Orbiter_2.0_v1.1.6.stl
Filament_release_lever_Orbiter_2.0.stl
x_frame_Mini_Stealth_left_v1.2.2.stl
x_frame_Mini_Stealth_right_v1.2.5.stl

It will probably omit the version numbers so that I don't have to change the webpage every time I upload a newer version of a part. All of the listed .stl files are in the Downloads section here.


  • Like 1
  • Voron FTW! 1
Link to comment
Share on other sites
2 hours ago, atrushing said:

When I finish that configurator it should spit out a list like this for your inputs:


[a]_Mini_Stealth_Orb_2.0_Dragon-Rapido_UHF_v1.2.4.stl
Cable_door_Orbiter_2.0.stl
status_LED_carrier.stl
status_LED_logo_diffuser.stl
Motor_bridge_frame_Orbiter_2.0_v1.1.6.stl
Filament_release_lever_Orbiter_2.0.stl
x_frame_Mini_Stealth_left_v1.2.2.stl
x_frame_Mini_Stealth_right_v1.2.5.stl

It will probably omit the version numbers so that I don't have to change the webpage every time I upload a newer version of a part. All of the listed .stl files are in the Downloads section here.


Thank you for you support.

Link to comment
Share on other sites
On 8/10/2023 at 3:18 PM, bthubs said:

perhaps a work around would be to design a lever for the right side of the shroud

Six months later...

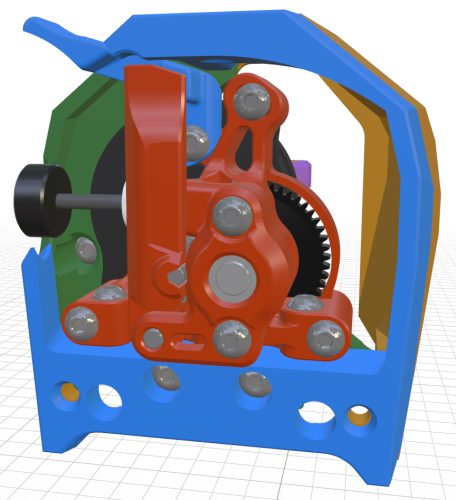
This has been on my ever growing ToDo list for a while and, after figuring out a solution for adding a lever to the Hummingbird extruder, I adjusted it to fit the Orbiter 2.0 and soon I will do the same for the Orbiter 1.5. I also want to make a shorter printable idler arm so the extruder fits better inside of the shroud.

20240228_210005.thumb.jpg.7b718676cb0ba11db06fe20e46b9d71d.jpg

20240228_210111.thumb.jpg.d5d20b561890e52bc253c408c8429858.jpg

It requires a smooth M3 socket head cap screw (5.4mm head diameter). The screw needs to be removed from the extruder, then set the lever in place and insert the screw through it.

This setup will not work with the reversed screws due to your EBB36 PCB install but I will be making new umbilical PCB mounts for each extruder based on this design ↓

2024-02-28-221728_634x661_scrot.png.5bdb913c0f48767a831a2a5517c81dbd.png

Orbiter_2.0_Filament_Release_Lever_v1.1.stl

  • Like 1
Link to comment
Share on other sites
On 8/10/2023 at 3:18 PM, bthubs said:

to design a lever for the right side of the shroud and create a hole through the cable door.

As promised, here are the new parts for mounting an umbilical PCB as well as two cable_door versions with a cutout for the filament release lever. I have also changed the release lever slightly to give it a greater range of movement. The shorter idler_arm is also finished and included.

20240229_132414.thumb.jpg.d79a718bf03a5c81712ae678e2b9d224.jpg

2024-03-01-144746_709x849_scrot.thumb.png.1ddac7824b0e7a203c63af3f3281d7a6.png

Cable_Door_Orb2.0_Fil_rel_lever_v1.1.stl Cable_Door_Orb2.0_Fil_rel_lever_Fil_sensor_v1.1.stl Orbiter_2.0_Motor_Bridge_Umbilical_PCB.stl Orbiter_2.0_Umbilical_PCB_Mount.stl Orbiter_2.0_Filament_Release_Lever_v1.2.stl Orbiter_2.0_Idler_Arm_Short_test_1.1.stl

  • Like 5
Link to comment
Share on other sites

Join the conversation

You can post now and register later. If you have an account, sign in now to post with your account.

Guest
Add a comment...

×   Pasted as rich text.   Paste as plain text instead

  Only 75 emoji are allowed.

×   Your link has been automatically embedded.   Display as a link instead

×   Your previous content has been restored.   Clear editor

×   You cannot paste images directly. Upload or insert images from URL.


User Feedback

×
×
  • Create New...