Jump to content

15 Screenshots

  • Like 21
  • Voron FTW! 14
  • Thanks 2

Recommended Comments


1 hour ago, atrushing said:

Thanks for this! It looks like you needed to trim the top and around the JST connector. Did you check if the M3 screws can hold the ESP32 in place?

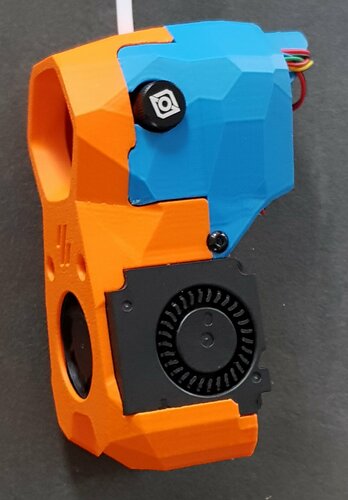
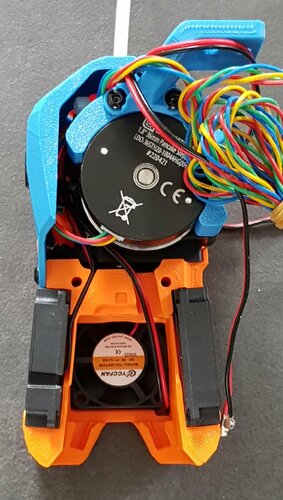
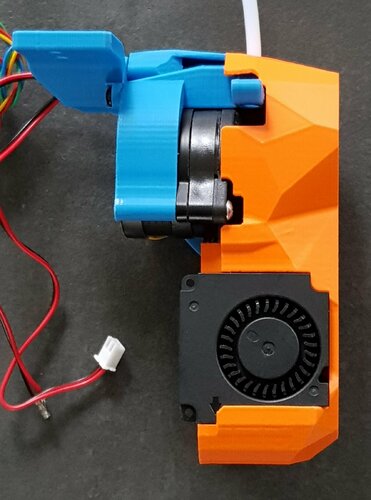
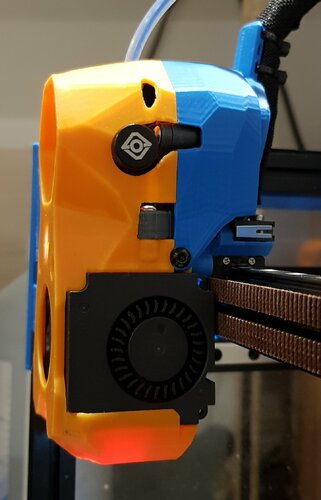
The board is held in snugly. I already have the hot end and the fans should be here within the next couple of days. I will get a picture or two of the finished product should everything assemble correctly. 

image.jpeg

20230629_141815.jpg

  • Like 1
Link to comment
Share on other sites
10 hours ago, atrushing said:

The bigger question is, which extruder are you using? If its the Orbiter 2.0, I would need to move their motor cutout and the stepper motor sits about 2.5mm further back than the Mini Sherpa so I don't know if that would be a problem for your build.

I also have a Kirigami bed, so I *think* I can absorb any potential loss in Y travel.


10 hours ago, atrushing said:

might need to add a bumper at the cable_door screw location because the fans stick out to the side.

That shouldn't be a problem. I've got the cropped version of the toolhead, so I can just fit a bumper here.


10 hours ago, atrushing said:

For now I just have a paypal.me account. Thanks for the offer but please don't feel obliged..

And thank you for this. I can't donate right at the moment, but that won't always be the case. 🙂

  • Like 2
Link to comment
Share on other sites
On 6/29/2023 at 3:37 PM, mysfiring said:

try and finagle D0's carriage into something resembling yours

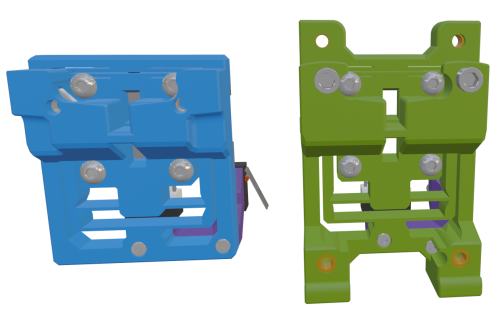
Here is a version of the Dueling x-carriage for the Mini Sherpa extruder that will fit the Mini Stealth.

2023-07-01-002643_1920x1054_scrot.thumb.png.993509a85bc5ef4ed2865810c99f849d.png

I will work on a version for the Orbiter 2.0 but I am afraid that the two heat-set inserts on the side will interfere with the stepper and will need to go. I'm just not sure how important they are..

I guess I will make another Sherpa version without the X-endstop recess and then Orbiter versions with and without the endstop.

Low_Side_X_Carriage_Mini_Stealth_Sherpa_x1.stl

  • Like 1
Link to comment
Share on other sites
2 hours ago, atrushing said:

I will work on a version for the Orbiter 2.0 but I am afraid that the two heat-set inserts on the side will interfere with the stepper and will need to go. I'm just not sure how important they are..

I guess I will make another Sherpa version without the X-endstop recess and then Orbiter versions with and without the endstop.

I deleted them from the geometry I was working with, as I too couldn't figure out how important they are - at least within a V0 context - if I had a D0, then they would likely be more important. (I also removed the zip tie holddowns on the D0 carriage because the cables are managed through the back of Mini Stealth.)

  • Like 1
Link to comment
Share on other sites

Ive done a crop version and wanting the LDO pico tool head mount but the one doesn't fit has anyone done one yet ?

Link to comment
Share on other sites
56 minutes ago, colly05 said:

Ive done a crop version and wanting the LDO pico tool head mount but the one doesn't fit has anyone done one yet ?

I can't find any dimensions or a 3D model of the Picobilical board but using an image of it I brought it into Blender to try to check the size. I can't verify, but it looks like the hole spacing should be about the same as the standard Umbilical PCB.

2023-07-02-225228_1920x1054_scrot.thumb.png.466b70a7967f205fad293362ce7c60ca.png

I know that some people use washers to space the PCB off of the umbilical_mount and leave space for the pins on the back side.

2023-05-01-153941_1920x1054_scrot.thumb.png.d0840b7277268d18a4c6c00f8bfcb5d1.png

Link to comment
Share on other sites
6 hours ago, atrushing said:

Sorry this has taken a while.

No worries at all! I've sliced this, and it's printing now. I'll be sure to let you know how I get on. Thank you!

(Also, because I'm of the mindset of 'teaching to fish' as opposed to 'being given a fish' how did you go about learning Blender for working with .stls? Is it just something that came by virtue of knowing already how to use Blender? Or was it something specifically tied to 3D printing?)

Link to comment
Share on other sites
2 hours ago, mysfiring said:

Also, because I'm of the mindset of 'teaching to fish' as opposed to 'being given a fish' how did you go about learning Blender for working with .stls? Is it just something that came by virtue of knowing already how to use Blender? Or was it something specifically tied to 3D printing?

Over my career I have used AutoCAD, SolidWorks and Catia but for personal projects I wanted to use something open source. I have also moved to Linux so my main choices were FreeCAD, LibreCAD, OpenSCAD and the most mature 3D option, Blender.

Since Blender can import .obj and .stl files and directly edit the mesh, a good place to start would be to remove text from the bottom of a print and fill the face back in, or stretching an existing model to a new dimension. The hard part is learning all of the keyboard shortcuts but there are many videos and resources online. The Blender Guru has some great videos like his famous donut courseMaker Tales has a lot of videos as well that are more directed at precision modelling in Blender. The main thing is to play with the software and try to accomplish different tasks while learning about some of the addons along the way.

  • Like 1
Link to comment
Share on other sites

Thank you. I'll add your suggestions to the stack. (Now it's just a case of being able to get time to look at the stack. lol.)

I did also want to mention one niggle I appear to be fighting with: I'm using a 3010 fan for the hotend heatsink and even though the nozzle LEDs have become considerably easier to insert (since a few revisions ago, at least) I have had to make a tiny modification, by way of my sidecutters. It's to try and reduce the approach angle for the LED/get it over the extra depth of the fan.

I'm happy with trimming this down, obviously, but maybe there's another way?

Thanks again! 😄

IMG20230704212510.jpg

Link to comment
Share on other sites
6 hours ago, mysfiring said:

Now it's just a case of being able to get time to look at the stack. lol.

True, and my stack keeps getting interrupted with new projects... At least my latest interruption is forcing me to learn more Blender processes!

2023-07-05-081534_1920x1054_scrot.thumb.png.a934fad0e3e2ed1bff5b72926e11f6f4.png

6 hours ago, mysfiring said:

I did also want to mention one niggle I appear to be fighting with: I'm using a 3010 fan for the hotend heatsink and even though the nozzle LEDs have become considerably easier to insert (since a few revisions ago, at least) I have had to make a tiny modification, by way of my sidecutters. It's to try and reduce the approach angle for the LED/get it over the extra depth of the fan.

I'm happy with trimming this down, obviously, but maybe there's another way?

I finally found this problem with the 3010 fan on my latest Vorpal 180 build and have only applied the improvement to the modified shrouds here in the comments. I do think that your solution of shortening the side rails is worth applying to the main models as it doesn't need too much material just to hold the LEDs in place. I have been designing an improvement to the part cooling ducting and would like to push a larger change to the Mini Stealth. I just can't decide if the fan modification should be the default design or if some people might find it too complicated/finicky..

  • Like 1
Link to comment
Share on other sites
5 minutes ago, atrushing said:

At least my latest interruption is forcing me to learn more Blender processes!

2023-07-05-081534_1920x1054_scrot.thumb.png.a934fad0e3e2ed1bff5b72926e11f6f4.png

Well, at least it's productive, right? (I don't think there are many things you can do on a computer aside from social media or gaming that aren't inherently productive. Heh.)

5 minutes ago, atrushing said:

I finally found this problem with the 3010 fan on my latest Vorpal 180 build and have only applied the improvement to the modified shrouds here in the comments. I do think that your solution of shortening the side rails is worth applying to the main models as it doesn't need too much material just to hold the LEDs in place. I have been designing an improvement to the part cooling ducting and would like to push a larger change to the Mini Stealth. I just can't decide if the fan modification should be the default design or if some people might find it too complicated/finicky..

I'm getting Rook vibes with Vorpal 180. Am curious to see how it develops. I did actually discover that you made a discovery (lol, I was searching the forums for clues as to why inserting the LEDs was so difficult, and you were surprised that nobody else had encountered a similar problem using 3010s) but didn't realise you had also pushed updated geometry. I'll have to have a look.

Oh, and I think if you can get extra performance out of the 4010s for the price of some glue and a printed part, I mean... I'd do the mod, but that's just me.

  • Like 1
Link to comment
Share on other sites
5 minutes ago, mysfiring said:

I'm getting Rook vibes with Vorpal 180.

That was the seed for the idea. I am printing the tophat right now but I got stuck on the design for a while because I was trying to figure out a perfect design instead of being happy with good enough.

13 minutes ago, mysfiring said:

but didn't realise you had also pushed updated geometry. I'll have to have a look.

I think the only updated LED versions so far are the Knomi/FlyHalo mods. Here you can see (in blue) how I have tilted the LED pockets backward to make insertion more accessible. Also you can see how the ducting gets cut off to direct the airflow more smoothly towards the nozzle tip but this would only work with the fan insert piece.

2023-07-05-091154_1920x1054_scrot.thumb.png.4b53054bdd776d2f4d4e49b3cf46d1f2.png

  • Like 1
Link to comment
Share on other sites
6 minutes ago, atrushing said:

That was the seed for the idea. I am printing the tophat right now but I got stuck on the design for a while because I was trying to figure out a perfect design instead of being happy with good enough.

I couldn't imagine how that actually feels - at least with the work that you do, let alone the thought behind the design of the parts, or the multitude of mod requests and tweaks, or the breakdowns into details about the issues that you encounter while designing. Yer a wizard, atrushing!
 

10 minutes ago, atrushing said:

I think the only updated LED versions so far are the Knomi/FlyHalo mods. Here you can see (in blue) how I have tilted the LED pockets backward to make insertion more accessible. Also you can see how the ducting gets cut off to direct the airflow more smoothly towards the nozzle tip but this would only work with the fan insert piece.

2023-07-05-091154_1920x1054_scrot.thumb.png.4b53054bdd776d2f4d4e49b3cf46d1f2.png

I would be more than happy to report back on modifying the 4010s (and the overall build experience in general) if it meant I can install the nozzle LEDs without breaking the edges of the LED carriers (that's happened more times than I'd like to admit...) or the need to do finger gymnastics in a limited space. I'm using the Orbiter 2.0 version, with a Dragonfly. No ABL. Please and thank you. 😄

  • Thanks 1
Link to comment
Share on other sites
14 hours ago, mysfiring said:

I would be more than happy to report back on modifying the 4010s (and the overall build experience in general) if it meant I can install the nozzle LEDs without breaking the edges of the LED carriers (that's happened more times than I'd like to admit...) or the need to do finger gymnastics in a limited space. I'm using the Orbiter 2.0 version, with a Dragonfly. No ABL. Please and thank you.

Here is the new version and the blower guide. Just make sure the impeller still spins freely when you glue in the guide.

2023-07-06-000436_1920x1054_scrot.thumb.png.678270e15962fceafe829337bf9f6e67.png

[a]_Mini_Stealth_Orb_2.0_Dragonfly_new_ducts.stl Blower_guide.stl

  • Like 2
Link to comment
Share on other sites
On 6/22/2023 at 4:20 PM, atrushing said:


On 6/26/2023 at 6:00 PM, atrushing said:

这在设计上有点尴尬,我相信它可以使用一些改进。在安装任何风扇之前,需要安装热定型插件。用两个 M3x20 螺钉固定热端后,需要安装左侧(从后面)部分冷却风扇。

2023-06-26-114255_1920x1054_scrot.thumb.png.20e28b713c2d941517b9b82eb1f1997a.png2023-06-26-114308_1920x1054_scrot.thumb.png.53550d6201c20da2829533728f1d765d.png

2023-06-26-114320_1920x1054_scrot.thumb.png.43137b9fa22664126110b27a1f4d125a.png

如果您可以验证这是否适合 Bambu 热端,那么我可以将其添加到主要下载中。


[a]_Mini_Stlb_Orb_2.0_Bambu_FlyHalo.stl正在获取信息...

Sir, I am changing my voron0.1 to 3Z(zruncho3d/tri-zero     Reliable, stable Klicky-style bed probing with the ZeroClick detachable probe).Can you help make it with ZeroClick?

Link to comment
Share on other sites
2 hours ago, zwj123456789 said:

Sir, I am changing my voron0.1 to 3Z(zruncho3d/tri-zero     Reliable, stable Klicky-style bed probing with the ZeroClick detachable probe).Can you help make it with ZeroClick?

This should work. It is for the Bambu hotend, the Orbiter 2.0 with filament sensor, Mellow Fly-Halo and the ZeroClick mount point. The separate ZeroClick mount piece is in the main downloads.

2023-07-16-120151_1920x1054_scrot.thumb.png.33ff6f147ca04eccdc3e3f81838c296d.png

[a]_Mini_Stealth_Orb_2.0_FilSensor_Bambu_FlyHalo_ZeroClick.stl

Link to comment
Share on other sites

Okay, some quick, initial feedback:

I found the best way to mount the fan blower guide pieces, without potentially getting them caught up in the impellers, and without fighting with super glue/making a mess/getting stuck to the fans unintentionally is to take the covers off the fans first so you can position them properly. Unfortunately, my bright idea moment was quickly dashed after trying to fit the covers back onto the fans - if the blower guides are pressed right up against the edge of the fan's casing, because the fan casing has a slight angle, the guides themselves will sit proud and prevent the fan cover from sitting flush.

Not to worry - I'll chisel these ones out before I print off some more - I think trimming them a little should help. (7.2mm tall, instead of 7.8mm.)

I'll let you know how I get on...

IMG_20230717_154243.thumb.jpg.c0f23133171f092ba114948c7689789f.jpg

Edited by mysfiring
Link to comment
Share on other sites

...On second thought, perhaps I won't. They're glued in surprisingly well, and if I slip with the removal (print spatula) tool, I'll likely either collide with myself, or the impeller blades. lol.

Link to comment
Share on other sites
1 hour ago, mysfiring said:

Okay, some quick, initial feedback:

I found the best way to mount the fan blower guide pieces, without potentially getting them caught up in the impellers, and without fighting with super glue/making a mess/getting stuck to the fans unintentionally is to take the covers off the fans first so you can position them properly. Unfortunately, my bright idea moment was quickly dashed after trying to fit the covers back onto the fans - if the blower guides are pressed right up against the edge of the fan's casing, because the fan casing has a slight angle, the guides themselves will sit proud and prevent the fan cover from sitting flush.

Not to worry - I'll chisel these ones out before I print off some more - I think trimming them a little should help. (7.2mm tall, instead of 7.8mm.)

I'll let you know how I get on...

IMG_20230717_154243.thumb.jpg.c0f23133171f092ba114948c7689789f.jpg

Thanks for the feedback. Maybe you could stick a strip of sandpaper to a popsicle stick to make a controllable sanding tool.

When I installed mine, I put a drop of superglue on the two sides and another on the end and slid it in using a flat tool to push it into place while stopping when the tool hit the edges of the blower. Either way, it is a bit of a delicate operation.

Here is a new insert version that should fit an M3 screw so that you can hold and manage the insert easier. I will try to design a simple tool that can be screwed on temporarily to make sure that the insert can be installed flush with the bottom of the blower.

2023-07-17-085302_1920x1054_scrot.png.1cbc7302db9c066f636505a068a591ae.png

I have also substantially improved the ducting since the last shroud I posted here and have gained another 10% increase in airflow.

2023-07-17-090141_1162x1048_scrot.thumb.png.f41ba5b1203ba6d2097a494e04bfdc4e.png

Blower_guide_v1.1.stl [a]_Mini_Stealth_Orb_2.0_Dragonfly_new_ducts_v1.1.stl

Link to comment
Share on other sites
30 minutes ago, zwj123456789 said:

Sir, this fixing ring is too easy to break. I think you can learn from Mellow's design

There just isn't enough room for their screen support ring. I will put some more work into the design and try to find a stronger solution.

2023-07-17-094927_1920x1054_scrot.thumb.png.f369825c2c2d2447a85cdb85e70b805f.png

Link to comment
Share on other sites
14 hours ago, mysfiring said:

way to mount the fan blower guide pieces, without potentially getting them caught up in the impellers

I have worked up a tool that should help hold and align the air guide while the superglue sets up. It connects to the guide with an M3x20 M3x18 screw.

2023-07-17-182242_1920x1054_scrot.thumb.png.bf5254c209840da525fbb4f10723127f.png

Blower_guide_tool_M3x20.stl

Edited by atrushing
  • Like 1
Link to comment
Share on other sites

Join the conversation

You can post now and register later. If you have an account, sign in now to post with your account.

Guest
Add a comment...

×   Pasted as rich text.   Paste as plain text instead

  Only 75 emoji are allowed.

×   Your link has been automatically embedded.   Display as a link instead

×   Your previous content has been restored.   Clear editor

×   You cannot paste images directly. Upload or insert images from URL.


User Feedback

×
×
  • Create New...