Jump to content

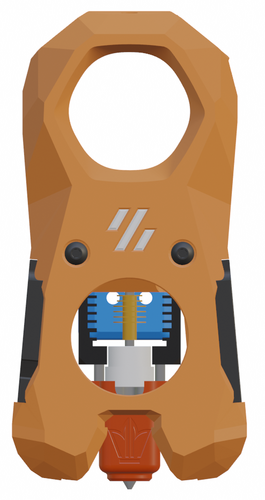
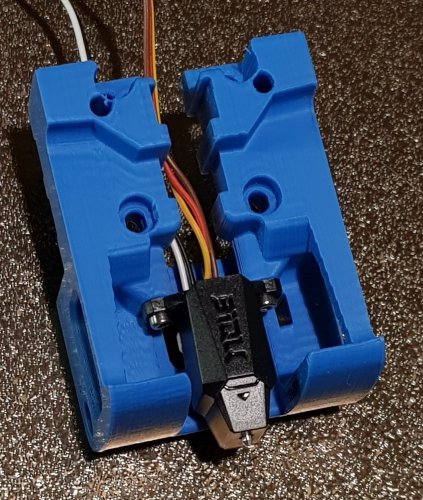
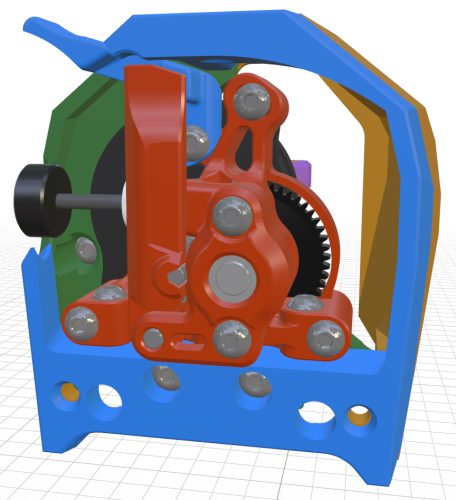
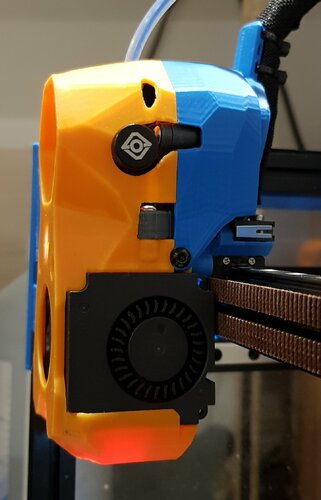
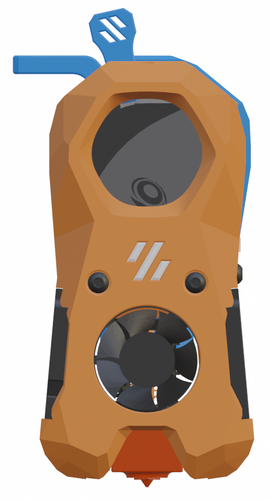
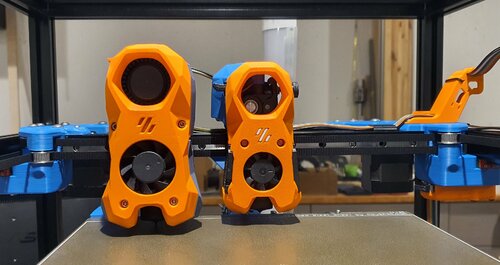
15 Screenshots

  • Like 21
  • Voron FTW! 14
  • Thanks 2

Recommended Comments


17 hours ago, xF4m3 said:

It came out looking amazing 😄

I agree! The triple-color is a great touch.

20 hours ago, xF4m3 said:

Also  Would it be possible to do the same for the beta4 as you did with the beta 3 here? https://github.com/MasturMynd/Boop/tree/main/beta_4/STL
The parts you combined were the Front and pcb upper.

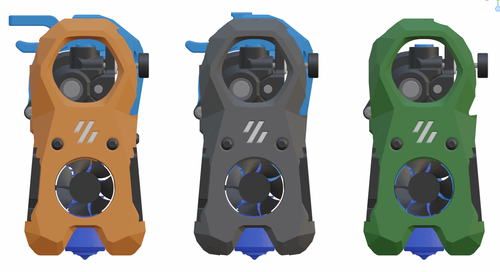
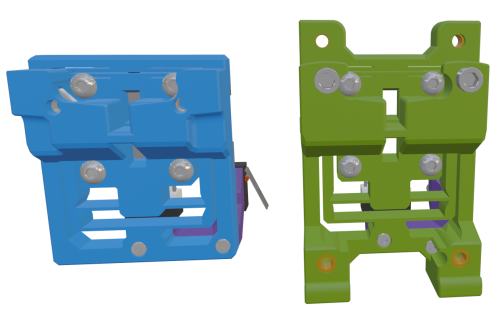
I will try to find some time to work on this but my priority right now is the Vorpal 180. Also, I don't want to get stuck chasing beta versions. Their beta_4 is in blue. The PCB mount has been moved back and the lower section has changed a bit.

2023-05-21-152833_1920x1054_scrot.thumb.png.dead3527d0227e61bb99b4296c0d0941.png

  • Like 1
Link to comment
Share on other sites
On 5/21/2023 at 3:36 PM, atrushing said:

I agree! The triple-color is a great touch.

I will try to find some time to work on this but my priority right now is the Vorpal 180. Also, I don't want to get stuck chasing beta versions. Their beta_4 is in blue. The PCB mount has been moved back and the lower section has changed a bit.

2023-05-21-152833_1920x1054_scrot.thumb.png.dead3527d0227e61bb99b4296c0d0941.png

Yeah sure 😄 gotta set prioritys, i will run with the beta3 then for the time beeing, arriving at building the gantry right now so i printed the mashup of the beta3. Adding some supports worked great and they even came off with just pulling it of the buildplate 😄 the supports just stuck to the plate. Lets see how this works out, maybe i can get the gantry assembled today. still got wiring etc to do though. So first startup will still be a few days in the future.

Edited by xF4m3
  • Like 1
Link to comment
Share on other sites
52 minutes ago, ByMalicious said:

Can I use BTT Knomi or will there be an update on the design soon ?

I will have to check the 3D model but it doesn't look like it will be very easy.

2023-05-30-005625_1920x1054_scrot.thumb.png.bf9798e1b4d25bf246a616b240f9f6d0.png

Link to comment
Share on other sites
4 minutes ago, ByMalicious said:

The friend who did this made an edit on tinkercad.

20230521_005859.jpg

20230521_005852.jpg

20230518_201426.jpg

20230518_201451.jpg

20230518_201444.jpg

image.png

That is brilliant!

Looks like it is for the LGX Lite but then it should fit with the Orbiter as well. I'm just not sure about the USB-C cable. Is that there only for programming it?

The other tricky part is that I would need to make 24 new shroud files for each extruder.

Link to comment
Share on other sites
On 5/20/2023 at 7:25 PM, xF4m3 said:

Hey, you combined the two parts and made a cutout for orbiter for the use of boop with this toolhead a few weeks back. They just made some substantial upgrades to the design for better ridgidity.Also  Would it be possible to do the same for the beta4 as you did with the beta 3 here? https://github.com/MasturMynd/Boop/tree/main/beta_4/STL
The parts you combined were the Front and pcb upper.

I took some time to make the new beta4 version of this. It will still need supports on build plate.

2023-05-31-153812_1916x1050_scrot.thumb.png.0834e91bbda8eeb147a107bb0208e75a.png

Mini_Stealth_Boop_beta4_front.stl

  • Like 1
Link to comment
Share on other sites
17 hours ago, atrushing said:

I took some time to make the new beta4 version of this. It will still need supports on build plate.

2023-05-31-153812_1916x1050_scrot.thumb.png.0834e91bbda8eeb147a107bb0208e75a.png

Mini_Stealth_Boop_beta4_front.stl 622.74 kB · 1 download

Oh heck yeah 😄 thanks so much for taking the time, will get this printed asap. I will see if i can assemble everything today aswell (disassembling and assembling those little toolheads always takes a Bit, they are so dang Compact for what they all do)

  • Like 1
Link to comment
Share on other sites
On 5/30/2023 at 12:04 AM, ByMalicious said:

Can I use BTT Knomi or will there be an update on the design soon ?

Do you want to check if this works? It is for the Revo Voron but if you use a different hotend then just let me know. It uses a modified LED carrier. The display should hook under at the top and use two M3x4 BHCS at the bottom.

2023-06-01-172822_1920x1054_scrot.thumb.png.7865b14e21e77b9349f804154174ba0d.png

[a]_Mini_Stealth_Orb2.0_Revo_Voron_Knomi.stl LED_carrier_simple.stl

Link to comment
Share on other sites
On 5/31/2023 at 3:41 PM, atrushing said:

I took some time to make the new beta4 version of this. It will still need supports on build plate.

2023-05-31-153812_1916x1050_scrot.thumb.png.0834e91bbda8eeb147a107bb0208e75a.png

Mini_Stealth_Boop_beta4_front.stl 622.74 kB · 1 download

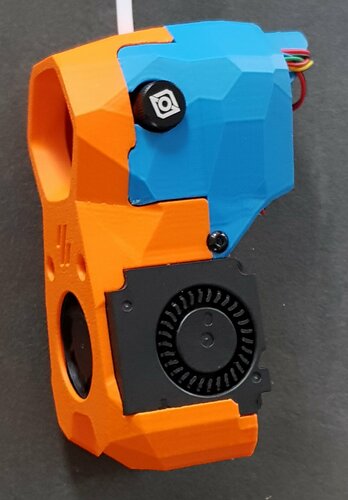
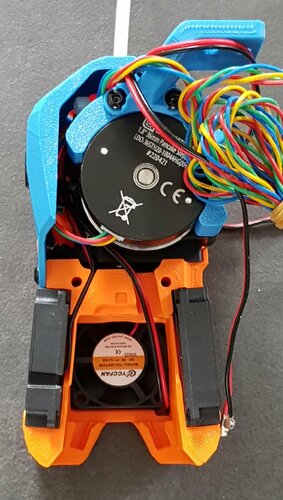
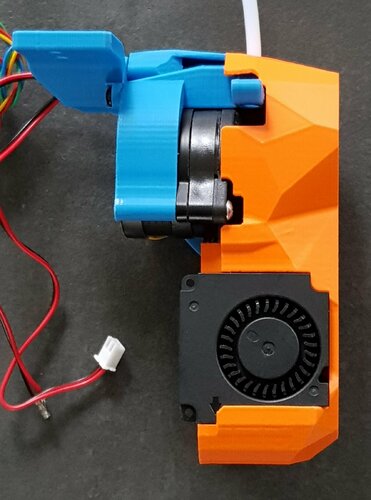
I just finished assembly, the beta 4 carriage is also installed and feels great  one set of heatsets is a bit difficult to get to but works. Other then that it seems to look great. Here are some Pictures of the finished toolhead 😄

Compress_20230604_204954_4958.jpg

Compress_20230604_204955_5504.jpg

Compress_20230604_204955_5853.jpg

Compress_20230604_204956_6495.jpg

Compress_20230604_204956_6184.jpg

  • Like 4
Link to comment
Share on other sites
On 5/2/2023 at 10:27 AM, atrushing said:

Here is what I have worked up with the optical top part. The only support needed is along the sides where I made clearance for the part cooling fans. The stepper motor needs to be rotated so the wires are at the top. This requires a new motor_bridge. The umbilical PCB mount I posted before should still work fine with this.

2023-05-02-095723_1920x1054_scrot.thumb.png.88587fca5cb09158de505e9c1a112c40.png

2023-05-02-101108_1914x1048_scrot.png.f213dc7a5588691c21329cda594a512f.png

Boop_front_-_Mini_Stealth_-_Orbiter_2.0.stl 2.58 MB · 5 downloads Motor_bridge_frame_Orbiter_2.0_Slim_Boop.stl 532.09 kB · 7 downloads

Hey, I noticed that the Motor bridge frame has only on pair of heatsets on the underside (print orientation), could you add some on the upper holes aswell? Screwing them in the plastic is a bit woobly since the "lever" action with umbilical/can is a bit much. Maybe making it a bit thicker where possible could also help this.

Also a heatset where the cable door screws into would be a welcome addition too 😄

Edited by xF4m3
Link to comment
Share on other sites
13 hours ago, xF4m3 said:

Hey, I noticed that the Motor bridge frame has only on pair of heatsets on the underside (print orientation), could you add some on the upper holes aswell? Screwing them in the plastic is a bit woobly since the "lever" action with umbilical/can is a bit much. Maybe making it a bit thicker where possible could also help this.

The problem with adding threaded inserts there is that the threads wouldn't align with the threading of the stepper motor. This would make a gap between the back of the stepper and the face of the bridge.

A better way of making the bridge more secure would be to insert M3x35 screws from the back, all the way through to the front and then secure the extruder with hex nuts.

2023-06-09-105746_1920x1054_scrot.thumb.png.c6ec792a4cab5e6de64f02b85cae076d.png

Motor_bridge_Reverse_screws.stl Cable_door_heatset_insert.stl

  • Like 1
Link to comment
Share on other sites
22 hours ago, atrushing said:

The problem with adding threaded inserts there is that the threads wouldn't align with the threading of the stepper motor. This would make a gap between the back of the stepper and the face of the bridge.

A better way of making the bridge more secure would be to insert M3x35 screws from the back, all the way through to the front and then secure the extruder with hex nuts.

2023-06-09-105746_1920x1054_scrot.thumb.png.c6ec792a4cab5e6de64f02b85cae076d.png

Motor_bridge_Reverse_screws.stl 122.25 kB · 1 download Cable_door_heatset_insert.stl 86.31 kB · 1 download

Oh i did not know that the holes dont line up, but the way you did it is probably better for stability anyway. It feels really solid now 😄 thanks alot


20230610_100922.jpg

  • Like 1
Link to comment
Share on other sites
On 5/30/2023 at 5:35 PM, ByMalicious said:

这样做的朋友在tinkercad上进行了编辑。

20230521_005859.jpg

20230521_005852.jpg

20230518_201426.jpg

20230518_201451.jpg

20230518_201444.jpg

图片.png


On 6/1/2023 at 11:38 PM, atrushing said:

您要检查这是否有效吗?它适用于Revo Voron,但如果您使用不同的热端,请告诉我。它使用改进的LED载体。显示器应在顶部钩住下方,并在底部使用两个 M3x4 BHC。

2023-06-01-172822_1920x1054_scrot.thumb.png.7865b14e21e77b9349f804154174ba0d.png

[a]_Mini_Stealth_Orb2.0_Revo_Voron_Knomi.stl正在获取信息... LED_carrier_simple.stl正在获取信息...

That is great! You are the master! I want to make it with mellow Halo and dragon hotend.But i can not edit the STL,Can you help me to make it?Thanks

Link to comment
Share on other sites
3 hours ago, zwj123456789 said:

That is great! You are the master! I want to make it with mellow Halo and dragon hotend. But i can not edit the STL, Can you help me to make it? Thanks

I can't seem to find any 3D model for the Mellow Fly-Halo. Their GitHub only has documentation and pinout info..

Link to comment
Share on other sites
On 6/1/2023 at 6:38 PM, atrushing said:

Do you want to check if this works? It is for the Revo Voron but if you use a different hotend then just let me know. It uses a modified LED carrier. The display should hook under at the top and use two M3x4 BHCS at the bottom.

2023-06-01-172822_1920x1054_scrot.thumb.png.7865b14e21e77b9349f804154174ba0d.png

[a]_Mini_Stealth_Orb2.0_Revo_Voron_Knomi.stl 597.64 kB · 5 downloads LED_carrier_simple.stl 10.63 kB · 3 downloads

I don't have a voron yet, I'm building it slowly.

I would appreciate if you let me know if you try it 🙂

Link to comment
Share on other sites
On 2/9/2023 at 12:36 AM, atrushing said:

我只使用我可以在亚马逊上获得的任何 3007 风扇,所以我在这里真的帮不上忙。

为每个不同的前端设计一个需要做很多工作,我不知道它们会有多大帮助。径向风扇对压力不好,因此您越限制流量,它们的效率就越低。我认为更重要的是确保空气有地方可以排出并带走热量。

我花了很多时间研究所有这些不同住房🤪的3D模型(我只需要找到VolcoMosq的模型......

2023-02-08-172939_1920x1054_scrot.thumb.png.c5d79b497b14fbe5107f8bfd868585a6.png

附上新的迷你隐身 - 轨道飞行器 2.0 - 龙(最小)以及 3007 适配器夹。

[a]_Mini_Stlb_Orbiter_2.0_Dragon_minimal_3010.stl正在获取信息... 3007_Fan_Spacer_v1.2.stl正在获取信息...

sir why do not have the Mellow Crazy Dragon volcano Toolhotend NF?

IMG_20230620_003134.jpg

crazy dragon.png

Link to comment
Share on other sites
3 hours ago, zwj123456789 said:

sir why do not have the Mellow Crazy Dragon volcano Toolhotend NF?

IMG_20230620_003134.jpg

Those dimensions should be close enough to use the Rapido HF shroud and it has the same hole pattern as the Dragon heat sink.

Rapido_HF.png.5e0a6cd342157c0cfe6bb6b385078207.png

Link to comment
Share on other sites
11 hours ago, atrushing said:

Those dimensions should be close enough to use the Rapido HF shroud and it has the same hole pattern as the Dragon heat sink.

Rapido_HF.png.5e0a6cd342157c0cfe6bb6b385078207.png

Thank you sir! I would like to use the Rapido HF shroud with Mellow fly Halo.But it is too  difficult for me to edit STL files.I tried many times and it was still unsuccessful.Can you help me?This is the Mellow FLY Halo STEP and STL.

Mellow Fly Halo.zip

Link to comment
Share on other sites
3 minutes ago, zwj123456789 said:

I would like to use the Rapido HF shroud with Mellow fly Halo.But it is too  difficult for me to edit STL files.I tried many times and it was still unsuccessful.Can you help me?

I am working on it but it is going slowly.

2023-06-20-093218_1920x1054_scrot.thumb.png.9c32f03b08eb5e1c0cb309d20b574947.png

  • Like 1
Link to comment
Share on other sites

Join the conversation

You can post now and register later. If you have an account, sign in now to post with your account.

Guest
Add a comment...

×   Pasted as rich text.   Paste as plain text instead

  Only 75 emoji are allowed.

×   Your link has been automatically embedded.   Display as a link instead

×   Your previous content has been restored.   Clear editor

×   You cannot paste images directly. Upload or insert images from URL.


User Feedback

×
×
  • Create New...