
-
TeamFDM.com is an UNOFFICIAL companion site for the DIY Voron 3D printer community. For official docs and final source of truth, visit the Official Voron Discord or the Voron Github
Printable Voron User Mods
Voron User Mods, or "UserMods", are a collection of community created and Team FDM curated modification for Voron Printers. All of these mods are available on the VoronUsers Github repo and unless otherwise specified follow the Voron communities GPL3.0 Licensing. Use any Mods at your own risk, if you make modification please share them on the VoronUsers repo.
Mod Authors: Have a Voron mod? Upload it at TeamFDM.com and let us know you're the author. We will ensure you can update and curate your files for more feedback! Please include tags for what Voron, or extruder your mod is compatible with.
652 files
-

NozzleWiper
Nozzle Wiper
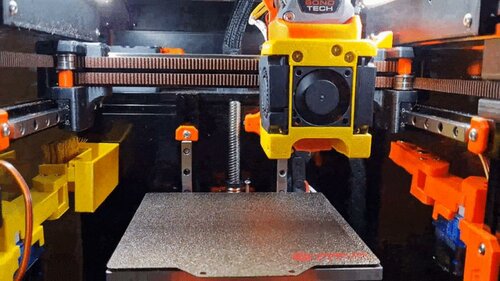
This is a nozzle purge and wipe mod for the Voron V0.1. It is based on the SlideSwipe magnetic probe by chestwood96.
It uses a snap in frame clip, that doesn't require screws, to attach a servo that extends a bucket and brush over the build plate for the hotend nozzle to clean it of filament debris for cleaner prints.
Goals:
Servo used to extend system over the print bed Bucket and brush to clean nozzle Snap in frame clip that does not need screws Klipper macros to control the entire process These have all been implemented in this public release.
Printing:
Use the Voron defaults and print in ABS or better The parts are orientated correctly in the STLs There is a single All In One STL that fits onto the v0.1 build plate to make life easier BOM:
1x Micro Servo 9G Servo Motor (SG90/MG90) 2x M3x8mm BHCS (for servo mount) 2x M3x6mm BHCS (for brush holder mount) 2x M2x10mm self tapping screws (optional: for snap in frame clip) 1x Nozzle cleaning brush in Copper 3x OD 4mm, length 16mm, PTFE tube 1x OD 4mm, length 7mm, PTFE tube Hardware:
Brush: https://www.amazon.co.uk/gp/product/B08H8SXBKM https://www.aliexpress.com/item/4000801101276.html
Servo: https://www.amazon.co.uk/gp/product/B0972M7JN1 https://www.aliexpress.com/item/1005001956791642.html
Assembly:
Step 1 - Set Servo
Take the servo and attach a single arm to the top. Slowly and gently rotate the rotor clockwise until it hits its limit. Remove the arm and replace it on the servo so that it is positioned slightly more than 90 degrees clockwise as shown in the picture above.
This sets the servo arm to its 0 position. Use the smallest screw in the servo packaging to affix the arm to the servo in that position.
Step 2 - Parts Preparation
Remove the support tabs from the bucket.
Cut down the brush head so that it matches the internal width of the brush holder. It's soft plastic so can be cut with a craft knife or a pair of angle cutters.
Cut the PTFE tube into 3 lots of 16mm and 1 lot of 7mm. These will act as the hinges.
Step 3 - Fit Servo to Mount
Push the cable connector through the slot provided in the servo mount as this will run on the inside of the extrusion. Fit the servo into the mount and fix in place with 2 M3x8mm screws. You may need to fettle the plastic around the hole for the top of the servo for it to fit. Note the correct orientation of the servo.
Step 4 - Servo Section Assembly
Place 1 of the 16mm pieces and the 7mm piece of PTFE tubing into the sections as shown above. Place the section with the space for the servo arm first and then the double ended section behind it. Carefully seat the PTFE tubes into the servo mount and fix in place with the angled part shown to the top of the mount:
Step 5 - Brush Section Assembly
Place the remaining pieces of 16mm PTFE tubing into the ends of the fitted sections and then fix onto the brush holder using the remaining 2 M3x6mm screws.
Fit the brush head into the brush holder:
Step 6 - Motion
Slowly and carefully, manually extend and straighten the arm to ensure a full range of motion:
Step 7 - Wiring
Before permanently mounting the nozzle wiper to the printer test whether it works as expected by wiring the servo to the MCU from outside of the printer.
Red wire = 5v Brown wire = GND Orange wire = signal pin There are various choices for connecting the servo to the MCU. Here will will refer to the BTT SKR Mini E3 V2.0.
Always turn off the printer before connecting or removing anything to or from the MCU.
The simplest is to connect to the Neopixel or E0-STOP connector if it is not in use as it provides all 3 required connections. Alternatively, a Klipper Expander can be used if there are no free pins.
Remember, do not fit the arm to the printer at this point.
Step 8 - Klipper
Upload the nozzlewiper.cfg file to your klipper configuration directory on the raspberry pi. If using Mainsail you can do this in MACHINE
386 downloads
(0 reviews)0 comments
Submitted
-
Voron 2.4 Revo Nozzle Holder
Voron Revo skirt mod
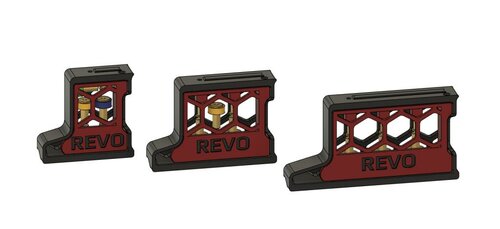
This is a modified skirt that lets you house the 3 current revo voron nozzles whilst they are not in use. Currently only designed for the 350, 300 is possible, 250 is small but I think I found a way to squeeze them all in
Designed for the Voron 2.4 R1 and R2
Hardware Required: 2 M3x8 or M3x10 SHCS.
They thread into the plastic and should be somewhat tight to keep the door closed, A design with a magnet may be in the works.
The Nozzles can either be left free floating, Or you can thread them into the top blocks if you do not want them rattling about.
A big shout out to So I says... [V0.420|VT.634] on the discord as he created the trident versions which gave me the drive to make these!
455 downloads
(0 reviews)0 comments
Submitted
-
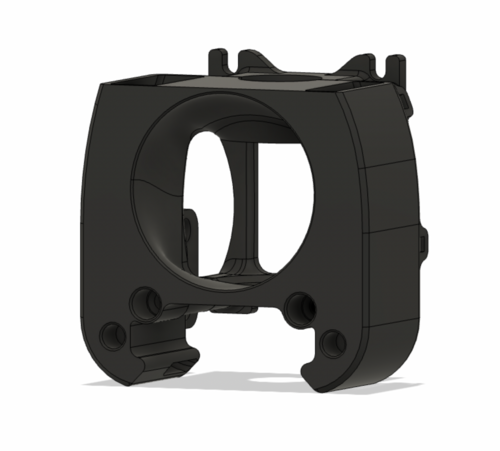
LGX Stealthburner Connector Cover
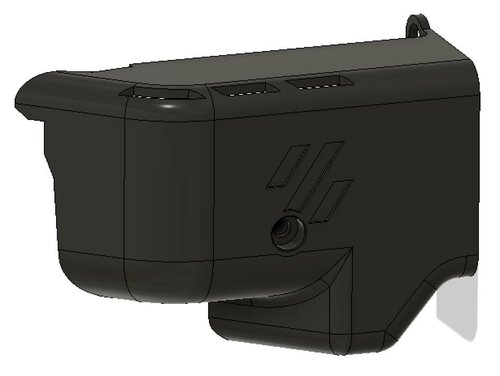
LGX stealthburner connector cover
This is a remix of craxoor's Afterburner PCB Cover designed to work with the Stealthburner and Bondtech's LGX Extruder.
105 downloads
- sammynorway
- v1.8
- (and 3 more)
-
Magnetic Panels With Magnet Inserts
Magnetic Panels with Magnet Inserts
There are various panel latches and magnetic clips that offer quick panel removal for swapping between enclosed- and open-chamber printing, but I wanted to fix a few of the pain points that I ran into with some of the existing mods.
Does not require a lot of filament. The corner and mid-panel clips were modeled after the stock Trident panel clips and are similarly hollowed, saving filament and print time.
Uses a thin strip of VHB to adhere to the panels. This should provide (1) solid adhesion without the need for drilling or extra fasteners, (2) some amount of squish for the magnets to pull against, and (3) the ability to adjust or remove them in the future.
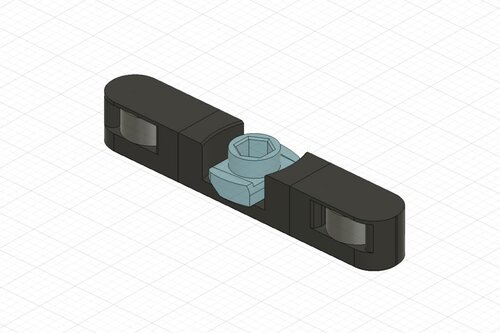
The frame magnet inserts are designed to (1) require only printed parts and no additional fasteners aside from the 6x3 magnets, (2) sit inside the frame slot flush against the aluminum frame face, (3) be easily adjustable, and (4) retain the magnets without glue and allow removal for correcting polarity or salvaging. Discord@PF VT.520 came up with the idea of using a hammerhead-style rotating nut to tighten and press against the magnet insert, holding it in place. There are two included versions of the inserts. Magnet-Insert.stl is the original design but may be slightly more difficult to print due to the bridging involved. Magnet-Insert-Side.stl is redesigned for easier printing; namely, reoriented on its side, uses 45° chamfers rather than fillets, and does not require bridging.
The panel's ability to sit right up to the face of the frame allows the panels to pop on and off without any interference.
The only required parts are a small amount of VHB tape and a lot of magnets (48 6x3mm magnets for each panel).
Magnet inserts hold two 6x3 magnets and is held in the aluminum extrusion with an unhammer
The corner and mid-panel clips hold matching 6x3 magnets
Installation jig makes it easy to set the proper spacing for corner inserts
1,781 downloads
-
Plug Panel Schurter
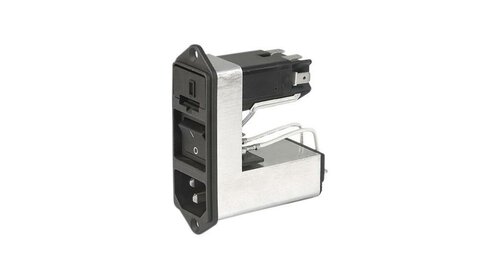
Plug Panel Mod for Schurter CD44.1101.151
Connection panel for Voron 2.4r1 with Schurter CD44.1101.151 power entry module. The panel has a LAN socket as well.
Compatibility with 2.4r2 not tested
The plug panel:
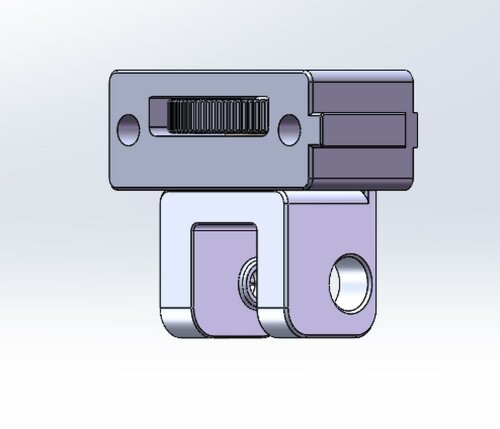
CAD and STL images:
Printed panel:
18 downloads
(0 reviews)0 comments
Submitted
-
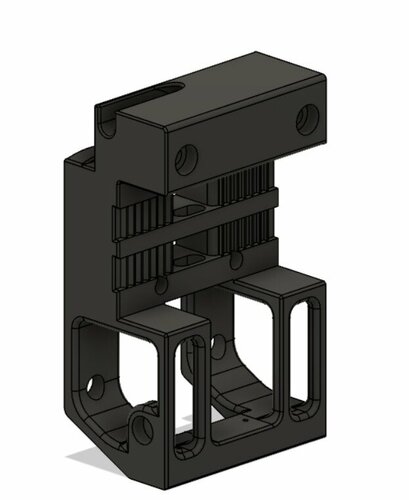
Tool Free Tensioner
Tool free tensioner
Name and specification Quantity SHCS M5x20 4 M4*0.7 Square nut 4 HHCS M4x16 4 D4x7x1(4x8x1)Flat washer 4 M5 Hex Nuts with Lock 4 bracket 2 tensioner 2 bracket image 2 tensioner image 2 wheel 4 PART PRINTING GUIDELINES
MATERIAL
ABS LAYER HEIGHT
Recommended: 0.2mm EXTRUSION WIDTH
Recommended: Forced 0.4mm INFILL TYPE
Grid Gyroid Honeycomb Triangle Cubic SOLID TOP/BOTTOM LAYERS
Recommended: 5 WALL COUNT
Recommended: 4 INFILL PERCENTAGE
Recommended: ≥60%
614 downloads
-
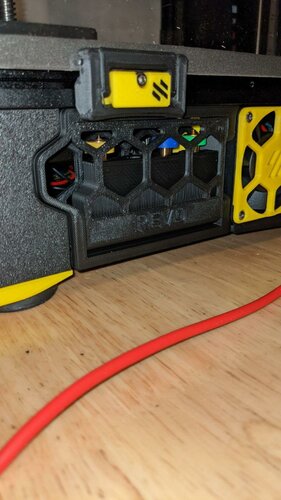
Corner Cable Cover With Drop Down Holes
Top Corner Cable Cover with Drop Down Holes (LED Wires)
Covers cables that are running around the top corners of 2.4R2 extrusions behind the Z idlers with drop down holes around the vertical extrusions and inline holes with cutouts to keep the wire management as clean as possible.
Holes are big enough to allow 2 pin microfit connectors pass through. Works perfectly with LDO LED PCB breakout board.
CAUTION Check your max Z travel as there will be some loss.
Printing
Print 1 cover per LED strip Default voron settings No supports needed BOM
Size Qty M3x8 2 M3 T-Nut 2 QTY per cover
228 downloads
-
Stealthburner Creality Toolhead
Creality toolhead for stealthburner.
Not recommended but a potential pathway for e3-
216 downloads
-
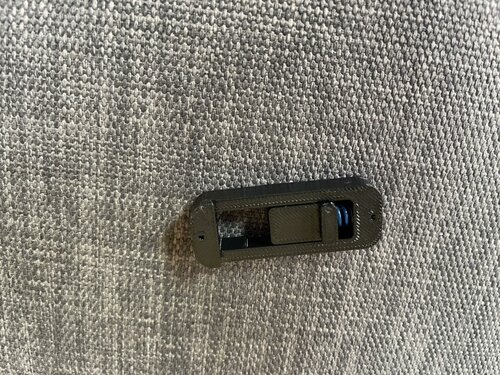
V0.1 Its Not A Sexbolt Switch
2 piece vented back Panels for Voron V0.1 Mounts with the stock V0.1 panel retaining clips. STL is sized for 2.5mm thick panels. 2 color print was made with a color change on layer 6 for a 2.5mm panel.
24 downloads
-
V0 Two Piece Back Panel
2 piece vented back Panels for Voron V0.1
Mounts with the stock V0.1 panel retaining clips.
STL is sized for 2.5mm thick panels.
2 color print was made with a color change on layer 6 for a 2.5mm panel.
128 downloads
(0 reviews)0 comments
Submitted
-
Stealth Zero
Stealth Zero
A low poly gantry mod for the Voron V0.1
In anticipation of the Mini Stealthburner I decided to alter the design of the V0.1 gantry to match the low poly aesthetic.
You can find the low poly front bed mount here: https://github.com/MapleLeafMakers/Stealth_Bed_Front
WARNING
I feel like it is worth mentioning that this mod is in active development. I've personally been testing the V0.1 parts along with the front mounted X carriage without any issues. zruncho3d has been providing feedback on the design of the BoxZero mod and will be testing shortly.
Included in this mod are:
Front mounted belt tensioners - These can be used to allow for additional tension adjustment in combination with the stock motor tensioners of the V0.1 or in conjuction with the rest of the items available in this mod for a full stealth look. Optional front mounted X rail - The use of the motor mounts included in this repo are required to maintain the full 120mm of Y travel. A custom designed, adustable Y endstop mount is included in the folder containing the X carriage. Toolless motor caps - I can't be the only one that's dropped something into the motors, right? BOM (WIP)
I've included the BOM for each individual component in their respective folders. There are a number of parts that are reused from a stock V0.1 build and the rest should be lying around as extras if you bought a kit. The only
184 downloads
(0 reviews)0 comments
Submitted
-
(0 reviews)
0 comments
Submitted
-
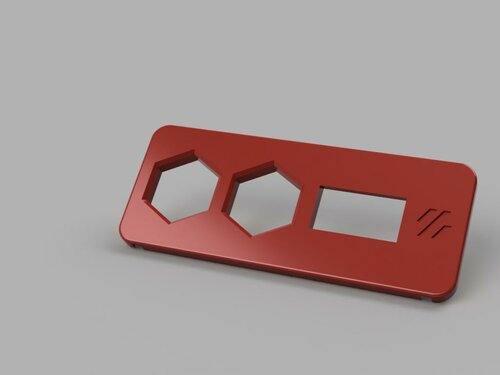
SSD1306 Case Front Cover
SSD1306 Case Front Cover by Lukas#2722
This is a front cover replacement that uses a SSD1306 Display.
The holes are the same size in the skirt so you can mount the G-Code Buttons by meteyou https://github.com/VoronDesign/VoronUsers/tree/master/legacy_printers/printer_mods/meteyou/gcode_buttons
Notes:
I didn't edit the backplate of the original design. I just used some side cutters and cut it out by hand.
It mounts the same way as the original using heatset inserts.
It also does not have the same shape as the original (there is no curve on the front face) that is just due to my lack in modelling experience.
0 downloads
(0 reviews)0 comments
Submitted
-
-
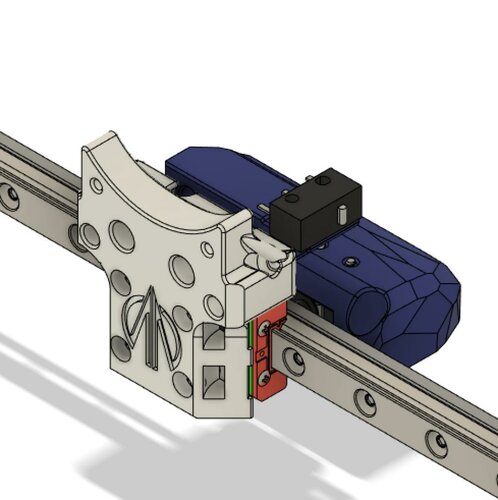
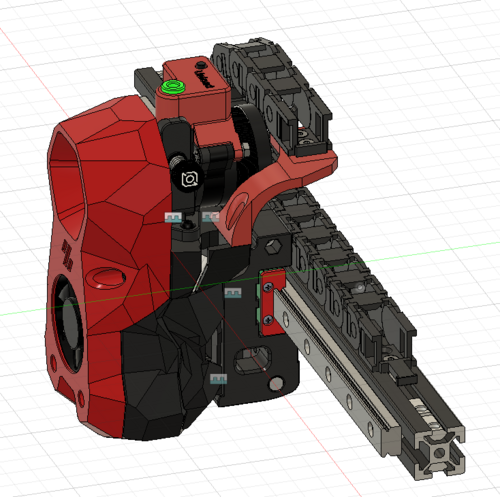
2.4 X Carriage
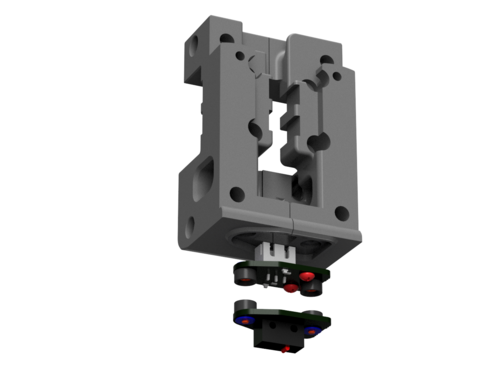
Voron 2.4 X Gantry adapted with a few things in mind:
- MGN12H carriage
- Annex Engineering Quickdraw Probe
- Allows hotend cables to go without hard corners
- Printed in one pice (with support and support gap)
Printed nicely, not tested yet!!
**Cables duct is a bit tight, I got mine through but might not work if you have pins already crimped at the end of the cables.
121 downloads
(0 reviews)0 comments
Updated
-
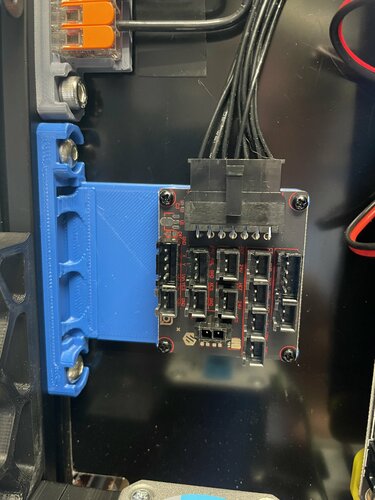
LDO breakout board mount for 2020 frame
I wanted to use the LDO breakout board and pre-made cable with my Voron build, but didn't have enough room on the DIN rails to mount it, so I made this frame mounted board holder for it.
It's a combination of the LDO din mount bracket, along with a 2020 mount from the Wago mount that comes with the Voron STLs. And a small reinforcement from one of the side skirts. Anyway, it's a mashup of things to make something useful, at least for my build.
Use the standard 5mm bolts & 2020 inserts from the standard Voron build that the Wago mount uses.
30 downloads
(0 reviews)0 comments
Submitted
-
Afterburner E3D Revo Six printhead
I make this mod to acomodate the E3D Revo Six hotend wiring on afterburner setup.In adition i create a adxl345 mounting option.
61 downloads
- paulthealien
- afterburner
- (and 1 more)
(0 reviews)0 comments
Submitted
-
Huvud Cover for LGX Lite ABBN30
Huvud cover for ABBN-30 with LGX Lite. You will need this Huvud mount
18 downloads
(0 reviews)0 comments
Submitted
-
SB X-carriage Euclid probe 2.4/Trident MGN 12
Stealth Burner X-carriage Euclid probe 2.4/Trident / MGN 12
left Right mounting the EUCLID probe with self taping m3x8mm screws
this X-carriage is remixed from
https://github.com/VoronDesign/Voron-Afterburner/tree/sb-beta/STLs/X_Carriage
I hope this helps
465 downloads
- 3dpmamsih
- stealthburner
- (and 5 more)
-
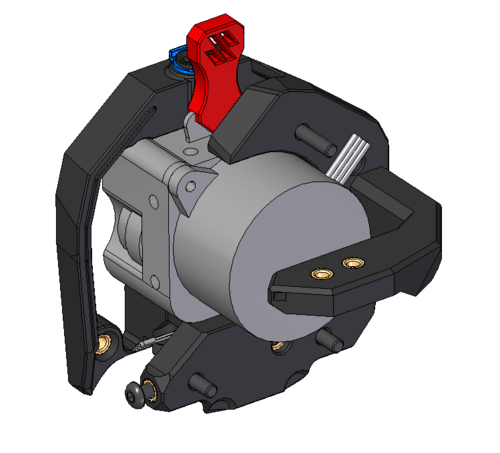
GX Lite Extruder Mount for the Voron Stealthburner.
LGX_Lite_Stealthburner_CW2_style_mount
LGX Lite extruder mount for the Voron Stealthburner. The standard bowden clip delivered with the LGX Lite is to be removed, and a standard UM2 connector has to be inserted in the top printed part. This style clip is to be used: https://nl.aliexpress.com/item/32896103430.html. If you're lucky you might have some laying around already.
LGX Lite mount ERCF
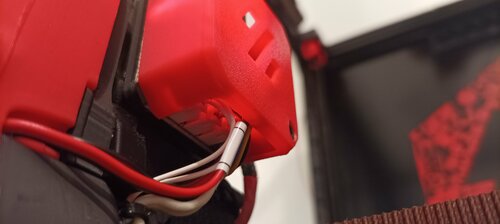
The ERCF version is made to accomodate the LGX Lite with the stealthburner and the new carriage, including the toolhead sensor as it is being used for the ERCF. The housing style is matching with the original CW2 design. I recommend to insert a 3mm long 4x2mm bowden tube on the bottom of the LGX Lite to guide the filament properly. The cover and cable carrier mount can be re-used from the original version. The top of the front body is made to insert the bowden tube until it reaches into the LGX Lite, through a standard bowden tube clip with retainer ring. A lever latch is designed to change the pretension on the filament.
The toolhead sensor is a standard hall effect switch (AH3364Q-P-B), which can be soldered to some wires with a connector. This sensor enters in between both halves of the support body and can be fixed using an angled M3x8 DIN912 bolt. Please be careful not to overtighten this bolt as it clamps directly onto the sensor housing. A standard washer M3 is to be inserted in the slot centered with the filament path. The magnet can be inserted in the front. Be sure to check the correct polarity.
To mount the LGX Lite to the body, use the 4 screws DIN912 M3x16mm, too long screws will damage the gears within the LGX!
M3 Threaded insert locations
In the front housing there are 2 threaded inserts M3 which needs to be placed on the 'inside' to fixate the actual Stealthburner cover to.
In the rear housing there are 4 threaded inserts M3 to be placed on the back as shown in the image below.
Cable hatch and cable carrier
The standard cable door hatch and cable carrier support can be re-used from the original CW2. Be sure to mount the cable door before mounting the LGX Lite into the housing. You won't be able to reach the fastener once the LGX Lite is placed.
I am not responsible in any way on how this impacts your printer. Use at your own risk.
477 downloads
- eytecz
- stealthburner
- (and 1 more)
-
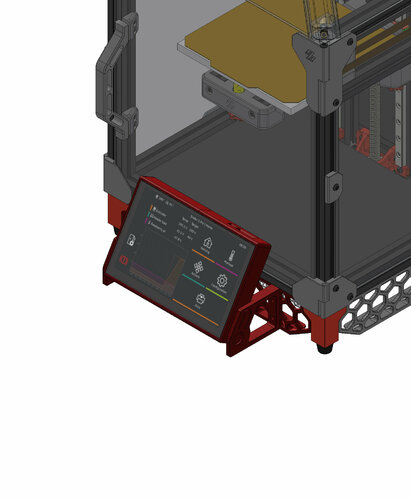
V0 BTT PI TFT50 Mount
This is a flip down TFT50 screen mount for the Voron V0.1. It's still a work in progress but it works and allows the screen to fold down so the door can be opened.
1,094 downloads
- xxroboduck
- v0.1
- (and 3 more)
-
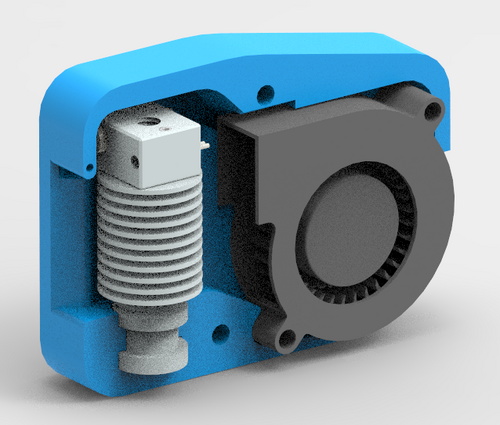
An Idea for a chamber heater
This is a sketch of an Idea that I had for a chamber heater. Its an V6 Hotend and an radial 5015 blower... There should be no gap between the heater block and the heat sink.
I need help / time to test it... what temperatur is acceptable, flow.....
95 downloads
-
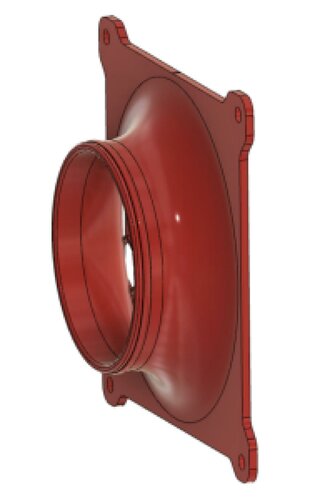
Revo Nozzle Skirt Trident
Revo_Nozzle_Skirt
A Revo nozzle box hidden in a Voron Trident skirt.
Compatible with 250/300/350 Tridents.
250 - 2 Nozzles each 300 - 4 Nozzles each 350 - 5 Nozzles each Bill Of Materials
2x 6mm x 3mm Round Magnet 2x M3 Heat-set insert 2x M3x8 BHCS Instructions
Print a Skirt and Nozzle Holder the appropriate size for your printer. the A version is for the front-left and back-right corners. and the B version is for the other 2 corners. install the 2 heat-set inserts into the ends of nozzle-holder part. install 1 magnet in the skirt, and one in the nozzle-holder such that they attract eachother when the door is installed. insert the nozzle holder into the skirt and fasten with 2 M3x8 BHCS Remove the stock skirt piece from your trident and install the new one in it's place.263 downloads
(0 reviews)0 comments
Submitted
-
C17 EXT CARTRIDGE
C17 -EXT-CARTRIDGE, HEPA Carbon filter
The C17-EXT-CARTRIDGE is designed to be used with the C17-EXT HEPA Carbon filter.
This is a first publication, although all parts has been tested, there may be errors do not hesitate to contact me.
Assembly Manual
BOMs
The list of parts is described in the manual.
HEPA 13 Filter
Use HEPA 13 filters from 10mm to 18mm thick. The best is to find a HEPA 13 filter for vacuum cleaner and cut it with a cutter. The references change according to the country.
I tested this one after cutting:
The best but I do not find the reference in other countries: Amazon.fr
Aliexpress 1
Aliexpress 2
Carbon
WARNING : Although the C17-EXT does not return treated air to the printer enclosure, use Acid-free Activated Carbon (Coconuts for example : amazon) !
Credits
The C17-EXT Activated Carbon Filter was modelled in Fusion 360.
Contributing
A complaint is a gift. Please, help me to improve the C17-EXT-CARTRIDGE !
License
Distributed under GNU General Public License version 3.0 (GPLv3)
Contact
Discord: OboMaker3D#0669 - ()
Acknowledgements
The Voron Dev Team
30 downloads
- OboMaker3D
- v2.4
- (and 2 more)
(0 reviews)0 comments
Submitted
-
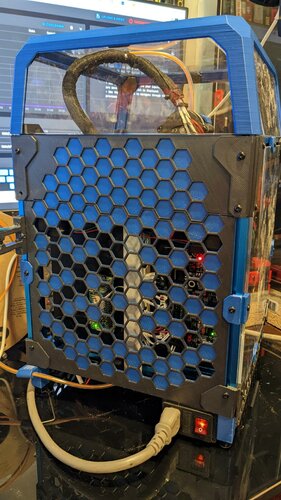
C17 EXT
C17 -EXT, External HEPA Carbon filter
The C17-EXT filter replaces the standard filter of the Voron 2.4 and to add one on the Switchwire . It has a 120mm fan and can use the C17-EXT-Cartridge filter (HEPA 13 and Carbon) or commercial HEPA Carbon filters.
This is a first publication, although all parts has been tested, there may be errors do not hesitate to contact me.
2 configurations
With adapter for standard back panel Voron
With specific back panel
For the Switchwire model only configuration 2 is possible.
2 options to replace the grid
Assembly Manual
BOMs
The list of parts is described in the manual according to the chosen configuration.
Fan
For the 120mm fan, follow the recommendations in the documentation. 3 models:
Efficient but noisy, the best choice (4000 rpm) : Aquatuning Alphacool 24810 ES (tested) Less powerful but quieter (3000 rpm) : Noctua NF-F12 iPPC 3000 PWM (tested, acceptable for commercial cartridges) Less powerful but quieter (3000 rpm) : Sunon MEC0251V1-000U-A99 (Not tested) If you find other models at 4000 rpm, please send me the references.
Filter cartridge
Two possibilities :
Using the C17-EXT-CARTRIDGE Use a commercial cartridge : Alveo3D Credits
The C17-EXT Activated Carbon Filter was modelled in Fusion 360.
Contributing
A complaint is a gift. Please, help me to improve the C17-EXT filter !
License
Distributed under GNU General Public License version 3.0 (GPLv3)
Contact
Discord: OboMaker3D#0669 - ()
Acknowledgements
The Voron Dev Team
342 downloads
- OboMaker3D
- v2.4
- (and 2 more)
(0 reviews)0 comments
Submitted


-
Most Actively Discussed Mods
-
Hottest Files!
.thumb.jpg.2c879d60315f8d86612bb06a137c204a.jpg)

