
-
TeamFDM.com is an UNOFFICIAL companion site for the DIY Voron 3D printer community. For official docs and final source of truth, visit the Official Voron Discord or the Voron Github
Printable Voron User Mods
Voron User Mods, or "UserMods", are a collection of community created and Team FDM curated modification for Voron Printers. All of these mods are available on the VoronUsers Github repo and unless otherwise specified follow the Voron communities GPL3.0 Licensing. Use any Mods at your own risk, if you make modification please share them on the VoronUsers repo.
Mod Authors: Have a Voron mod? Upload it at TeamFDM.com and let us know you're the author. We will ensure you can update and curate your files for more feedback! Please include tags for what Voron, or extruder your mod is compatible with.
652 files
-

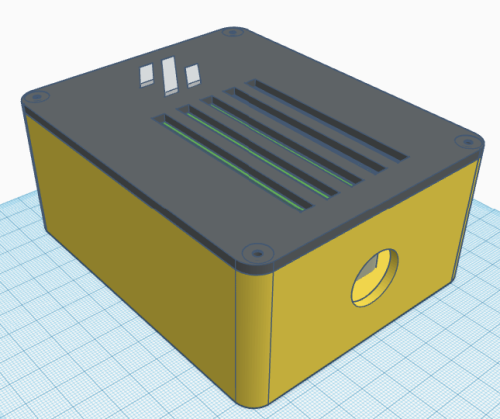
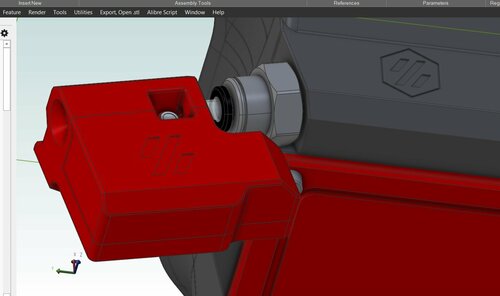
Another Voron 2.4 Chamber Heater
This is a box for a chamber heater for my Voron 2.4.Even with proper sealing my printer sometimes requires a lengthy heat soak so I decided to add a supplemental PTC chamber heater. The inspiration for this project came largely from the posting by ahough on Team FDM although I took a slightly different approach as I wanted a integrated thermal safety switch instead of a thermal fuse.
BEGIN STANDARD VORON WARING
NOTE: Voron Design does not recommend the use of additional chamber heating due to the increased risk of fire. The Voron 2.4 is designed to get sufficient chamber heat from the two existing heaters (bed and hot-end).
END STANDARD VORON WARING
I found a suitable candidate at my local Walmart on clearance for $5. The Mainstays unit I'm using is 120V 350W and comes with an integrated 12V fan, voltage converted board, and 80C temperature safety cutoff switch. Unfortunately, the case itself is just a bit too large so I designed a cover and case to rehouse everything. The OEM case, converter board, mains switch, and tip-over safety switch can all be binned as they're not needed. The only items to keep are the fan, heater, heater mount/frame, and thermal safety switch.
The OEM heater was designed for fresh air intake and I didn't want the thermal switch affected by recirculating the already heated chamber air. Therefore, I mounted the heater outside the chamber itself at the back of the printer. This does of course entail cutting a hole in the Voron 2.4 back panel!
The 120V source is wired to output side of the new solid state relay, switched by one of the BTT Octopus MCU's hot-end outputs (in my case, HE0). I inserted an additional thermistor between the heater's fins (like ahough did) to enable Klipper monitor and control the heater temp and set the max temp to 120C. When everything was up and running, I performed a PID tune on the new chamber hearer.
I also included a Voron logo insert that I printed in transparent filament that may utilize some additional LEDs in the future. Note that it did require a little post-process filing to get it to fit YMMV!....
BOM
1x Mainstay 350W Personal Mini Heater
1x DC to AC Solid State Relay with Single Phase Plastic Cover
1x [DIN Rail Mounting Bracket(https://www.amazon.com/dp/B08J6TQ2W2?psc=1&ref=ppx_yo2ov_dt_b_product_details)
1x NTC100K Thermistor Sensor
Assorted wiring and connectors.
!!! Optional - But Highly Recommended Whether or Not You Are Adding A Chamber Heater!!!:
1x Automatic Fire Extinguisher
66 downloads
(0 reviews)0 comments
Submitted
-
Crown Cooler - CPAP Ring Cooler for Trident, V2.4
This mod originally was developed to
mount a Rapido HF and UHF hot end. improve overall cooling performance by increasing airflow using a CPAP tube provide uniform cooling with airflow directed downwards be lightweight and easy to maintain be compatible with standard voron carriage and extruder mounting parts work with klickyprobe
Installation Instructions / compatibility
The most up to date files can be found in the github!
This mod uses the standard X carriage parts. This mod should work with all types of extruder mounting parts, including CW2 (however, I have not yet tested it). I use the orbiter V2 extruder mount found here. Print the cooling duct with no supports (if your printer can handle the overhang at the top) or build plate only supports, file in STL folder. Print the front toolhead part with supports. The rear toolhead part is the standard rapido voron part. Print the offset klickyprobe mount, file in STL folder.
Planned features
Rapido HF support [DONE!] Mounting location for ADXL gyro Euclid probe support
140 downloads
(1 review)0 comments
Updated
-
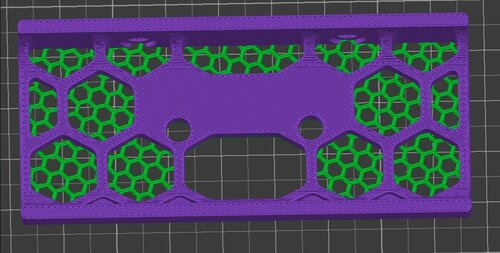
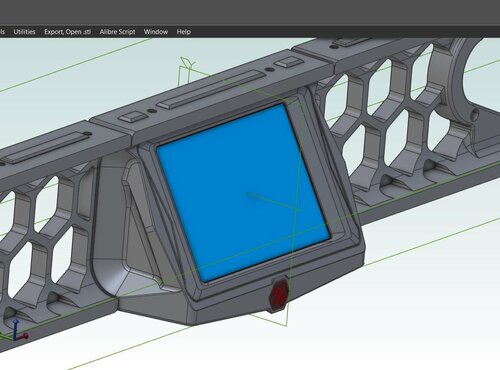
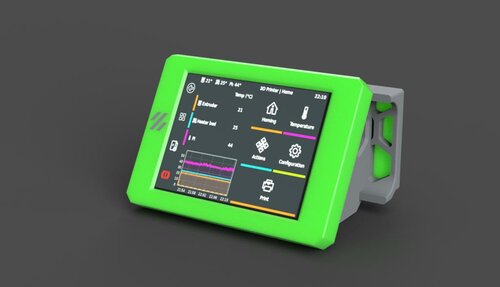
V0.2 Mesh-Ready TFT 43 Skirt
I modified this v0 trident skirt file found here here on GitHub to have a sub-component that can be easily sliced into a mesh. I'm certain that the printable mount from the aforementioned page can be modified and adapted independently to attach other displays to this skirt. I made this for another user, but im posting it so that others don't have to put in as much effort as I did going forward.
To make this .STL do the mesh thing, drop it into superslicer, right-click the part, hover over the "split" option in the menu, then select "split into parts". when you do this, the part will be split into two merged parts in your parts list view in the slicer. Select the flat solid skirt cover part in the list, right click the selected part and click "Perimeters & Shell" and "infill". Set the number of top and bottom solid layers to 0. I like to make the perimeter count 2. Screenshots from slicer are in the Spoiler below if you want visual help.
I used Honeycomb infill at 23% density and a filament swap at layer 4 to get the result in the IRL photo here. I recommend playing around with the infill settings a bit because you can get some really cool results. Gyroid and rectilinear infills make pretty neat meshes at higher densities (30%-50%). More visual examples are in the spoiler below.
The rest of the v0.2 skirts with pre-prepared meshes can be found here. One-Part side skirts with pre-prepared meshes can be found here, posted as the "closed" variants of the STLs.
I followed this video tutorial to make this from the provided STEP file on the previously mentioned/linked printables page.
The printables file that I modified was derived from golas's v0 trident skirt remix
55 downloads
(0 reviews)0 comments
Updated
-
BLTouch Mount for Stealthburner
This version of bltouch mount for stealthburner was designed to avoid covering the fan area. Also has spacer tubes for the screws that mount it. v. 1.0.0
Nothing fancy. I use raft on tube spacers but nothing on other files.
109 downloads
(0 reviews)0 comments
Updated
-
Amazon Cam Holder
Camera mount for 1080p webcam bought on Amazon.
CA Amazon Link for WebCam - https://www.amazon.ca/gp/product/B07VL7BNLZ/ref=ppx_yo_dt_b_search_asin_title?ie=UTF8&psc=1
US Amazon Link for WebCam - https://amzn.to/3LxCFUN
30 downloads
-
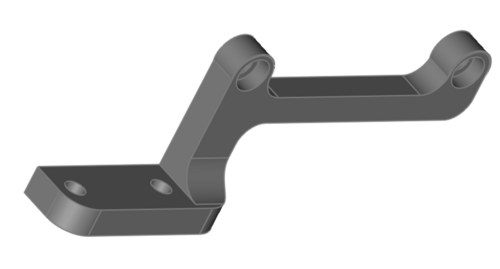
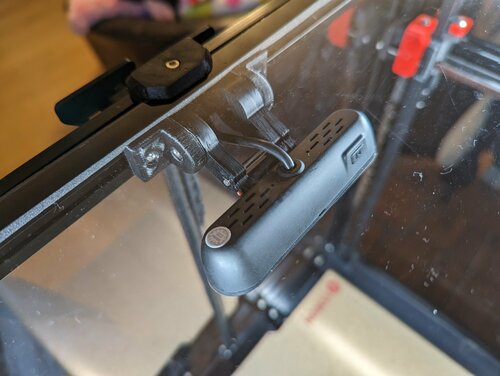
I.O. - Handy Webcam Holder
See full description in README.md or at https://github.com/iovsiann/handy-webcam-holder
A handy webcam holder for Voron 2.4, 3D printers using 2020 extrusions. It gloriously fits common webcams that have a horizontal tube-like hole in the back - and mounts to the aforementioned 2020 extrusions. https://github.com/iovsiann/handy-webcam-holder/
Print the parts. Use ABS, PETG or ASA that can withstand temperatures higher than PLA in your print chamber. Take an M3 screw long enough to span between the two arms; drive it through the left arm into the plastic hole of the right arm Mount the camera using a piece of 1.75 filament Affix the two extrusion mounts to the 2020 extrusion using M3 screws and extrusion slot nuts or T-nuts or hammer nuts or roll-in-spring nuts Tighten the long M3 screw gently. The webcam should stay firmly in place (not drop down), but be moveable by hand with little effort. Don't overtighten.
112 downloads
(0 reviews)0 comments
Updated
-
Display housing for BTT TFT35 SPI V2.1, for the BTT CB1 specific display
I think I finally got to a version that prints without a bunch of weird settings and crazy supports.
This is a screen case for the BTT TFT35 SPI V2.1 that BigtreeTech introduced for their CB1, Raspberry Pi alternative. The CB1 has the drivers for this display built-in. I went created and printed multiple variations of this design over the last few days, and kept having difficulty coming up with a bezel design that both looked good, and was doable on a FDM printer. Keeping the overhands, bridges and support requirements low was the hard part.
This version looks like it will work, and also should give you options for various color variations.
The Screen sits a couple millimeters below the level of the housing face, which allows the bezel's accent insert to cover the electronics traces around the screen perimeter. The accent insert is printed separately and glued to the screen retainer using a few drops of super glue. The screen retainer and bezel insert both have locating features, which will help you keep everything aligned while gluing them together.
The housing attaches to your Voron using 2 M3x8mm socket head cap screws, in the same manner as the Voron skirts. The screen retainer needs 4 M3x6mm socket head cap screws that thread into the screen retainer from the backside, to secure the screen into the housing.
The little logo insert also is glued in place with a drop of super glue. The bezel parts will give best results printed at .1mm or less layer height.
The included file for the skirts are the 300mm size, and are included for your convenience. They are the same file as the default Voron 300mm skirt and covered under Voron's GNU 3.0 license. The screen case is of my own design.
For those of you who already printed one of the earlier versions, I apologize for the inconvenience. All files are updated to the latest version.
1,039 downloads
-
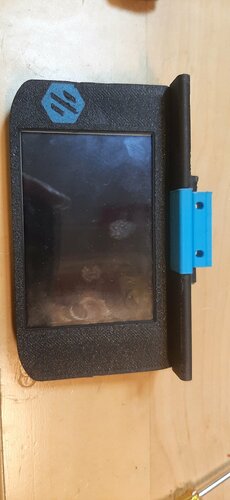
Voron touch screen case for Waveshare 4.3" Capacitive HDMI USB-Touch display
This is designed to fit the Waveshare 4.3" USB-touch version of their HDMI TFT touch screen.
It mounts to the underside of the rail in the same manner as the skirts, using t slot nuts and M3x8mm socket head cap screws. The screen attaches to the housing using the four screws that come with the touchsceen.
This will only fit if you have the 180 degree HDMI and USB adapters that come with the Waveshare display. See attached picture.
This is designed to fit the 300mm and 350mm Voron models. You will need to use the front skirts for the next size smaller Voron. For example, if you put this housing on a 300mm Voron, you will need the front skirts for the 250mm version. The 350mm Voron will need the skirts from the 300mm.
If your screen doesn't come with the screws, I believe they are M2.5x6mm, but im not certain.
I've included the .stp file, in case someone needs to modify a version to fit something else.
No supports needed.
58 downloads
(0 reviews)0 comments
Submitted
-
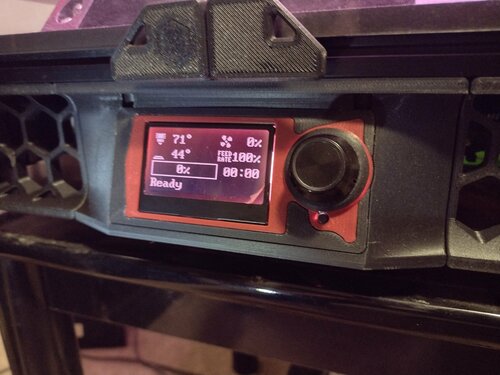
Voron housing/case for BTT Mini12864 display
This requires front left and right skirts that are 1 size smaller than your printer. For example, if you have a 300mm Voron, you need the front skirts from the 250mm printer.
It attaches to your printer the same way the skirts do, using two M3x8mm screws and 2 T slot nuts.
The bezel will require four standard Voron size M3x4mm heat set inserts, and the bezel, and screen are held in using 4 m3x10mm socket head cap screws.
The bezel accent insert is attached to the bezel using super glue.
311 downloads
-
(0 reviews)
0 comments
Submitted
-
Filament Runout Sensor, Switch housing for KW12-3 roller microswitch
I designed this to replace the tube guide for my side entry exhaust housing. It requires a heat set insert, an m3x8 socket head cap screw, a KW12-3 microswitch and a jst 2.54 connector. I used a couple drops of super glue to secure the miscro switch and the electrical connector in place during assembly.
104 downloads
-
Voron0.2 2.8 WaveshareDisplay
Voron 0.2 Waveshare 2.8 DSI Display
BOM
Waveshare Display
DSI Cable
This display mount attaches using stock hardware on the V0.2 as well as the hardware that is included with the display
Thanks DragonKitty! for testing the display mount To install the display follow the driver installation procedure on waveshares website here
if you find that the drivers that you need are not included in the waveshare repo, they removed older versions but i have zipped and uploaded those here along with the old instructions from waveshare
After the drivers are installed run the following command to open up the config.txt for the raspberry pi
cd ~ sudo nano /boot/config.txt This line you added in the driver installation
dtoverlay=WS_xinchDSI_Touch,invertedy,swappedxy,I2C_bus=10 Needs to be changed to
dtoverlay=WS_xinchDSI_Touch,invertedy,invertedx,I2C_bus=10 save and exit that file
then while still ssh into the pi you will need to place this file in the following directory, you may have to create that directory if it is not already created
/usr/share/X11/xorg.conf.d/ now you can proceed with installing klipperscreen as normal i typically use kiauh to do that as it makes it that much easier
129 downloads
(0 reviews)0 comments
Submitted
-
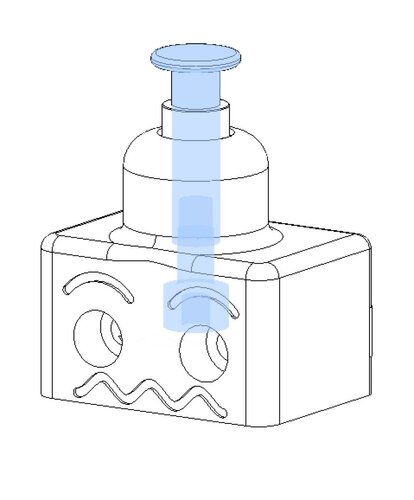
Voron2.4 SexBolt ZEndstop
SexBolt Z endstop
This an alternative way to do the Z endstop pin in a V2, instead of using a deflanged GT2 20T pulley, it uses 2 5x7x8 sleeve copper bearings/bushing this is pretty simple to assemble. The reason behind this is to help keep the pin from falling out.
BOM
Screws Size Qty Link M4x8 SHCS 1 Bolt Depot - M4x8 SHCS 5mmx20mm Binding Screw 1 Amazon - Binding Screw M2x8 Self Tapping 4 Amazon - M2x8 SHCS Self Tapping 5x7x8 Sleeve Bearing 2 Amazon - Sleeve Bearing Z endstop PCB 1 Formosissima - Z endstop PCB Full kit can be purchased here
First just insert two of the sleeve bearings into the top, they should bottom out with about 2mm or so poking out the top
Next insert the female side of a 5mmx20mm chicago screw (sex bolt, binding barrel) and screw in the M4x6 or M4x8 SHCS with some loctite to make sure it doesn't move over time
Next insert the Z endstop PCB and secure it with 4 m2x10 self tapping screws
Next just secure it to your V2 like you would the stock Z endstop
This mod was based on the work done by Voron Discord User L.e.o.p.a.r.d for the Micron 3d printer.
205 downloads
(0 reviews)0 comments
Submitted
-
(0 reviews)
0 comments
Submitted
-
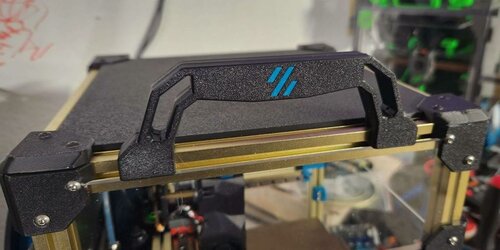
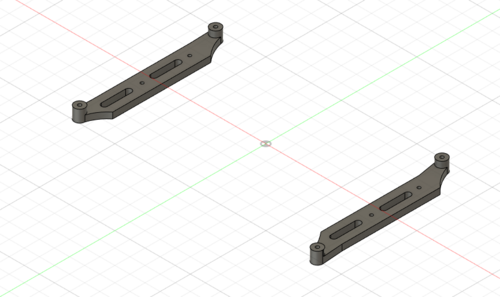
V0.2 Handles
V0.2 Handles
Add handles to the extrusion tophat so you can sling that thing around. Easy to install, just follow the below steps.
NOTE - remove the top panel before you proceed. Replace panel once install is complete.
Step 1
Insert
168 downloads
(0 reviews)0 comments
Submitted
-
MiniSB Sharkfin
MiniSB Sharkfin
Modified the MiniSB toolhead to accomodate the Sharkfin extruder.
109 downloads
-
MiniSB Rapido
Modified the MiniSB to accomodate the Rapido hotend. As a result, the height of the cowling is increased by 3mm.
67 downloads
(0 reviews)0 comments
Submitted
-
(0 reviews)
0 comments
Submitted
-
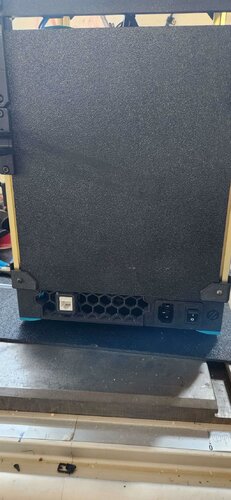
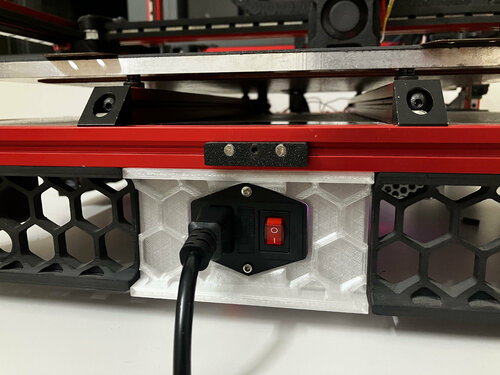
Front Power Inlet
I know some might feel this is a dumb design but as a tester, I prefer it goes. Just in case things went south
Print as standard instruction.
Use M3 8mm to mount (You might want to use heat inserts)
PETG/ABS is good enough
7 downloads
(0 reviews)0 comments
Submitted
-
Manta 8P mount for Voron DIN Clip. In center of the rail !!!
I found a couple of mounts but they ar not in the center of the rail (they place the holes wrong)
This version does the trick.
56 downloads
(0 reviews)0 comments
Updated
-
CW1 for TAP
I wanted to use Tap instead of Klicky/euclid probe on my V2.4 but i only had CW1 with Stealthburner so i set about seeing if it was possible to modify CW1 to fit TAP as CW1 motor mount fixes from the rear which TAP can't do.
I managed to find a solution so now this CW1 mod fixes from the front instead of the rear.
The left side mounting screw now fixes the CW1 Extruder Motor Plate from the front with an M3x8 SHCS screw going through to the heatset in the Tap Upper as in Pic1, the same as designed for CW2.
The right side screw now goes through the font of the CW1 Extruder Body with an M3x30 SHCH screw going through to the heatset in the Tap Upper as in Pic2, again the same as designed for CW2
Once the two parts of CW1 are mounted to the TAP then the Printhead Rear/Front can be mounted on the Tap as per Tap instructions for CW2 printhead mounting, the CW1 Extruder Body has access cut outs in the front for alen keys to be able to tighten those little screws that hold the printhead in place, the rest of the build is as per TAP SB fitting instructions.
I have had this mod on my V2.4 with SB and CW1 for a couple of months now and it works great....
50 downloads
- tap
- stealthburner
- (and 3 more)
(0 reviews)0 comments
Submitted
-
Voron 2.4 Side Entry Exhaust Housing
The stock exhaust housing requires alot of stand-off distance from the wall, behind the printer. Also, unless the radius of the Bowden tube loop is kept pretty big, it causes quite a bit of feeding friction between the filament and the inside of the Bowden tube. I modified the stock exhaust housing to allow for a more direct entry.
Using this version, I am able to run my CW1 extruder with a lower tension setting for my drive roller. Oddly, it improved my vertical wall surface finish too. I'm not sure how/why this would improve the surface finish, but the difference was noticeable.
It requires two additional m3 heat-set inserts for the guide/funnel mounting location. The guide/funnel attaches via two M3x6mm socket head cap screws.
If you print and use one of these, feel free to post a make, and give me a like either here, or on Printables.
I'm working on a filament run out sensor version of the tube guide. It will use the KW12-3 roller type microswitch. I'll post the model when I get it finished.
505 downloads
-
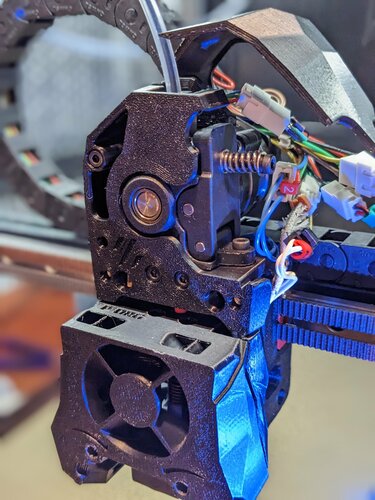
StealthBurner Orbiter v2 and Filament Sensor
Hi All
Here is my take on the Orbiter v2 and Filament sensor and mount for BTT EBB36. Could not have done this without the already existing excellent work form spacelab_2021.
2,110 downloads
-
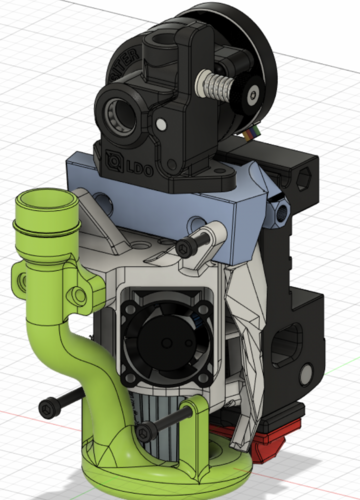
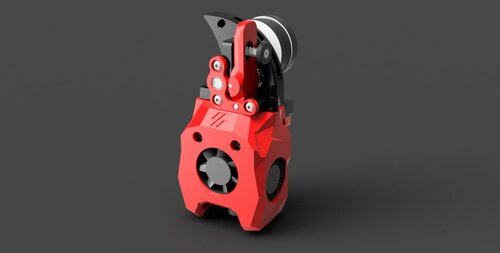
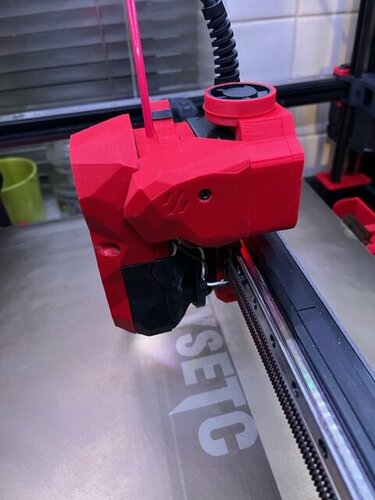
orbiter Super Stealth Orbiter ( Orbiter 1.5 )
This is the Super Stealth Orbiter, a super low profile mount/housing for your Orbiter 1.5 with easy access for servicing the Orbiter without removing it from the printer/housing.
After using 3dPmamsih 'Orbiter 1.5 for StealthBurner' for a few months I knew there were a few things I wanted to change.
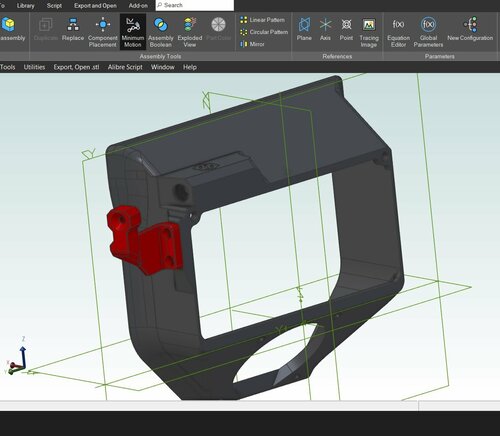
1) To have an unbroken PTFE path from the exit of the orbiter directly down to the hot end. 3dPmamsih version had a break and required two pieces of PTFE with a bit of housing between. There were a few times my filament hung up in this section, so I wanted to remove it.
2) To break the full loop in front of the Orbiter that prevented the idler door from fully opening. This further prevented easy access to clean the gears and thus service or clean the extruder.
3) To have a proper Bowden tube coupler.
4) Various tweaks to the design to add additional reinforcement, rigidity, ease of assembly, and overall long term durability.
5) A sleek look that gives little to no indication of the extruder being used. This includes removing the thumb wheel from the idler tensioner and instead simply using an m3 bolt. In my case I find I can still tension to the desired amount with just my fingers and the bolt. I also don't tend to adjust this much once its set.
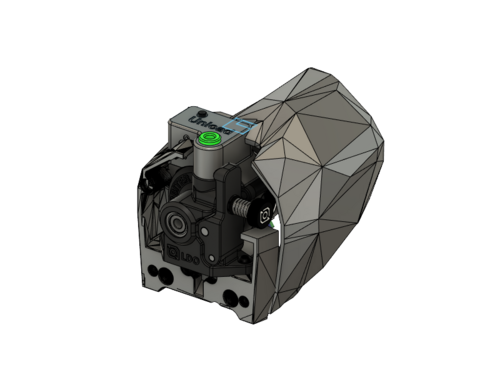
PTFE path
BOM: (Ill add this soon, but nothing special. If you have some m3 hardware and heat sets from your build you are probably good to go.
Compatibility: Super Stealth Orbiter works with Orbiter 1.5 (I think that means the 1.0 should work too. Not sure.), the new MGN 12 based X-carriage (bolts go in from the front) and StealthBurner of course.
Please do leave a comment and let me know how its working for you.
If anyone wants to see a version for 2.0, send me one! Ill model it up and test it out. Don't need the motor, just extruder 🙂
Finally, Ill try get a GitHub repo up for this as well.
Thanks to 3dPmamsih. His design is the foundation for the Super Stealth Orbiter. I believe he adapted his design from Eytecz LGX lite mount, so big thanks to him too. (https://github.com/Eytecz/LGX_Lite_Stealthburner_CW2_style_mount/ ) "for his mount of lgx lite on SB to inspire me to complete this orbiter 1.5" .
574 downloads
- clockwork
- stealthburner
- (and 3 more)
-
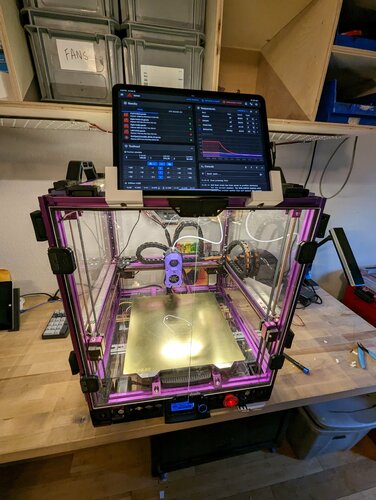
Simple iPad Pro Mount
A set of simple mounts that hold an iPad Pro. In this case, holding an 11" iPad on a 300x300 2.4r2.
Needed hardware:
2x M5x8 Cap-head Bolts 2x M5 tee-nuts62 downloads
.thumb.jpg.1d5d478be427931736b88a0bac56de90.jpg)


-
Most Actively Discussed Mods
-
Hottest Files!
.thumb.jpg.2c879d60315f8d86612bb06a137c204a.jpg)

