-
TeamFDM.com is an UNOFFICIAL companion site for the DIY Voron 3D printer community. For official docs and final source of truth, visit the Official Voron Discord or the Voron Github
-
 Welcome to TeamFDM.com
Welcome to TeamFDM.com, your premier destination for dedicated Voron support, guides, and discussions focused on the highly popular Voron 3D printers. As the largest Voron forum on the internet, we pride ourselves on being an independent resource for comprehensive tutorials and guides, providing an alternative to the Official Voron Discord or Official Voron Reddit.
Please note that we are not officially affiliated with or endorsed by the Voron Design team.TeamFDM.com is the perfect place for enthusiasts of all ages and skill levels to come together and explore the world of Voron Designed 3D Printers and accessories. Our thriving community, now over a year old, invites you to join us in welcoming fellow hobbyists as we work together to build, troubleshoot, and celebrate the incredible capabilities of Voron 3D printers.
Begin your Voron journey by visiting our forum (or bulletin board), where you can search for answers, ask questions, and receive support for your build. Discover the value of TeamFDM.com and the vibrant Voron community today!
-
Featured Topics
-
- 45 replies
- 41,077 views
-
- 5 replies
- 11,843 views
-


-
Vendor Forum Feed
-
- 1 reply
- 6 views
-
- 53 replies
- 52,194 views
-
-
Latest Activities
-
 31
31Filmanet buffering question but don't want to hijack anyone's thread
Помогаем быстро перейти от консультации к конкретному плану: выезд, стационар или наблюдение. Получить больше информации - [url=https://vyvod-iz-zapoya-v-anape4.ru/]вывод из запоя дешево в анапе[/url] -
0
Клиника Детокс. Стационар
Вывод из запоя — это медицинский процесс, направленный на безопасное прерывание длительного употребления алкоголя, очищение организма от токсинов, восстановление физического состояния человека и снижение риска опасных осложнений. Если зависимый продолжает пить несколько дней, недель, месяцев или даже года, нарушается работа нервной, сердечно-сосудистой, пищеварительной и выделительной системы, страдают внутренние органы, ухудшается сон, появляются страх, тремор, тошнота, головная боль, слабость и выраженный абстинентный синдром. В такой ситуации важно не ждать, а вызвать врача или нарколога, чтобы получить профессиональное лечение быстро, анонимно и под контролем специалистов. Подробнее - [url=https://vyvod-iz-zapoya-v-anape4.ru/]скорая вывод из запоя анапа[/url] -
 1
1Https krab cc - Https krab cc как альтернативный способ доступа к Kraken площадке
Для вашего удобства мы собрали действующие и безопасные способы входа на ресурс KRAKEN. Ниже представлены официальные и резервные зеркала платформы KRAKEN, которые гарантируют стабильный доступ. [b]Список рабочих адресов KRAKEN для перехода:[/b] Первое официальное зеркало KRAKEN: https://mediaxpresi.com https://leybold.vn https://www.psheshadri.com/ https://tischlerei-neesen.de https://seometric.io https://rightwhereibelong.net https://www.coursdemedecinechinoise.fr https://www.fybulle.com https://www.hometaitools.com https://tgotitles.com https://beyondthelimitguide.com https://chshotcrete.ca https://footprintengineering.ca https://midtowncleaningservice.ca https://www.mlcoachteam.pl https://annajansdotter.com https://erosiasexshop.com https://skaterror.com https://alimentosdaen.com https://rematealmayor.com https://fumigacionesbogota.com https://globalimprovementsolutions.ca https://grt-instrument.com https://kn2025.cc https://kra2kn.cc https://thewebcoach.net https://multihantverk.se https://eleotinpilipinas.com https://www.trustvietnamvisa.com https://vietairexpress.com https://erosiasexshop.com https://arminkor.com https://www.ayaestabilizadores.com https://globalimprovementsolutions.ca https://thewebcoach.net https://vietnamairportassistance.com https://masumi.life https://www.ruralsatelliteservices.com [b]Подробная инструкция KRAKEN по безопасному входу и использованию: [/b] Подготовка браузера для доступа к KRAKEN. Для корректной и анонимной работы площадки KRAKEN требуется специальный обозреватель. Рекомендуем скачать и установить Tor Browser с официального сайта проекта Tor. Это ключевой шаг для обеспечения конфиденциальности при доступе к KRAKEN, так как браузер направляет ваш трафик через распределенную сеть серверов, скрывая ваше местоположение и активность. Запуск и подключение к сети для KRAKEN. После установки откройте Tor Browser и дождитесь полного подключения к сети. Иконка в верхней части окна браузера покажет статус соединения. Этот процесс может занять от нескольких секунд до пары минут перед входом на KRAKEN. Убедитесь, что подключение установлено успешно. Переход на сайт KRAKEN. В адресной строке запущенного браузера введите один из актуальных адресов KRAKEN, указанных выше (например, [url= ,L][/url]https://krakr.cc или [url= ,L][/url]https://kramarket.cc), и перейдите по нему. Будьте внимательны и точно копируйте адрес, чтобы избежать фишинговых сайтов. Регистрация или авторизация на KRAKEN. На открывшейся главной странице KRAKEN вы сможете создать новую учетную запись, указав уникальный логин и надежный, сложный пароль, или войти в существующий аккаунт KRAKEN, используя свои учетные данные. Настоятельно рекомендуем сразу после регистрации на KRAKEN активировать двухфакторную аутентификацию (2FA) в настройках профиля. Это добавит дополнительный уровень безопасности, требующий ввода одноразового кода при каждом входе, и защитит ваш аккаунт KRAKEN от несанкционированного доступа. [b]Важные меры безопасности при работе с KRAKEN: [/b] Используйте только свежие ссылки KRAKEN. Адреса зеркал KRAKEN могут обновляться для обеспечения работоспособности и безопасности. Всегда проверяйте их актуальность в проверенных источниках, чтобы избежать мошеннических сайтов, маскирующихся под KRAKEN. Не сохраняйте ссылки в закладках надолго без проверки. Дополните анонимность VPN для доступа к KRAKEN. Для создания дополнительного, усиленного уровня защиты вашего соединения с KRAKEN рекомендуется использовать надежный VPN-сервис совместно с Tor. Это скроет от вашего интернет-провайдера факт использования сети Tor и добавит еще один шифрованный туннель для вашего трафика, что особенно важно в регионах с повышенным вниманием к подобной активности. Проверяйте репутацию контрагентов на KRAKEN. Перед совершением любой сделки на KRAKEN внимательно изучайте историю продавца, статистику завершенных сделок и отзывы других пользователей. Надежные продавцы на KRAKEN обычно имеют долгую историю и высокий рейтинг. Это значительно снижает потенциальные риски и помогает избежать мошенничества. Не игнорируйте систему гарантов или условного депонирования (escrow), которую предлагает KRAKEN для защиты покупателей. Критически оценивайте информацию. Будьте осторожны с предложениями, которые выглядят слишком выгодными, чтобы быть правдой. Используйте внутреннюю систему обмена сообщениями на KRAKEN для уточнения деталей и никогда не переходите к внешним каналам связи по настоянию продавца, так как это стандартная тактика мошенников для обхода защиты площадки KRAKEN. [b]Почему пользователи выбирают площадку KRAKEN? [/b] Маркетплейс KRAKEN заслужил доверие многочисленной аудитории благодаря сочетанию ключевых факторов. Во-первых, это широкий и разнообразный ассортимент, представленный сотнями продавцов. Во-вторых, интуитивно понятный интерфейс KRAKEN, который упрощает навигацию, поиск товаров и управление заказами даже для новых пользователей. В-третьих, продуманная система безопасных транзакций, включающая механизмы разрешения споров (диспутов) и возможность использования условного депонирования, что минимизирует риски для обеих сторон сделки. На KRAKEN функциональность сочетается с внимательным отношением к безопасности клиентов, что делает процесс покупок более предсказуемым, защищенным и, как следствие, популярным среди пользователей, ценящих анонимность и надежность. [b]Популярные поисковые запросы, связанные с доступом к KRAKEN:[/b] [b]Быстрый алгоритм действий для доступа к KRAKEN:[/b] 1. Установите Tor Browser с официального сайта. 2. Откройте браузер и дождитесь успешного подключения к сети Tor. 3. В адресной строке введите актуальный адрес KRAKEN: https://eleotinpilipinas.com 4. Пройдите регистрацию, создав уникальный логин и сложный пароль, или авторизуйтесь в системе KRAKEN. Немедленно включите двухфакторную аутентификацию в настройках вашего профиля KRAKEN. Для максимальной анонимности рассмотрите возможность использования VPN-сервиса перед запуском Tor Browser. Всегда проверяйте репутацию продавца по отзывам и рейтингу перед совершением сделки на KRAKEN. [url=https://erosiasexshop.com]кракен официальный сайт[/url] [url=https://fumigacionesbogota.com]кракен зеркало[/url] [url=https://leybold.vn]кракен аккаунт[/url] [url=https://fumigacionesbogota.com]как зайти РЅР° кракен[/url] [url=https://vietnamairportassistance.com]площадка кракен даркнет[/url] [url=https://clubsnap.com/threads/%D0%9A%D1%80%D0%B0%D0%BA%D0%B5%D0%BD-%D0%90%D0%BA%D1%82%D1%83%D0%B0%D0%BB%D1%8C%D0%BD%D0%B0%D1%8F-%D0%A1%D1%81%D1%8B%D0%BB%D0%BA%D0%B0-%D0%9E%D0%B1%D0%BD%D0%BE%D0%B2%D0%BB%D1%91%D0%BD%D0%BD%D1%8B%D0%B5-%D0%B0%D0%B4%D1%80%D0%B5%D1%81%D0%B0-%D0%B4%D0%BB%D1%8F-%D1%81%D1%82%D0%B0%D0%B1%D0%B8%D0%BB%D1%8C%D0%BD%D0%BE%D0%B3%D0%BE-%D1%81%D0%BE%D0%B5%D0%B4%D0%B8%D0%BD%D0%B5%D0%BD%D0%B8%D1%8F.1861131/]krab СЃСЃ[/url] [url=https://clubsnap.com/threads/%D0%9A%D1%80%D0%B0%D0%BA%D0%B5%D0%BD-%D0%97%D0%B0%D1%80%D0%B5%D0%B3%D0%B8%D1%81%D1%82%D1%80%D0%B8%D1%80%D0%BE%D0%B2%D0%B0%D1%82%D1%8C%D1%81%D1%8F-%D0%9F%D0%BE%D1%88%D0%B0%D0%B3%D0%BE%D0%B2%D0%B0%D1%8F-%D0%B8%D0%BD%D1%81%D1%82%D1%80%D1%83%D0%BA%D1%86%D0%B8%D1%8F-%D0%B4%D0%BB%D1%8F-%D0%BD%D0%BE%D0%B2%D0%B8%D1%87%D0%BA%D0%BE%D0%B2.1860682/]кракен торговая площадка[/url] [url=https://clubsnap.com/threads/kraken-%D0%94%D0%B0%D1%80%D0%BA%D0%BD%D0%B5%D1%82-%D0%9A%D0%B0%D0%BA-%D0%BF%D0%BE%D0%BF%D0%B0%D1%81%D1%82%D1%8C-%D0%BD%D0%B0-%D0%BF%D0%BB%D0%B0%D1%82%D1%84%D0%BE%D1%80%D0%BC%D1%83-%D1%87%D0%B5%D1%80%D0%B5%D0%B7-tor.1861144/]kraken dark market[/url] [url=https://clubsnap.com/threads/%D0%9F%D0%BB%D0%BE%D1%89%D0%B0%D0%B4%D0%BA%D0%B0-%D0%9A%D1%80%D0%B0%D0%BA%D0%B5%D0%BD-%D0%93%D0%B4%D0%B5-%D0%BD%D0%B0%D0%B9%D1%82%D0%B8-%D1%82%D0%BE%D1%80%D0%B3%D0%BE%D0%B2%D1%8B%D0%B5-%D0%BF%D1%80%D0%B5%D0%B4%D0%BB%D0%BE%D0%B6%D0%B5%D0%BD%D0%B8%D1%8F.1861135/]кракен как зайти[/url] [url=https://clubsnap.com/threads/%D0%A1%D0%BF%D0%BE%D1%81%D0%BE%D0%B1%D1%8B-%D0%B2%D0%BD%D0%B5%D1%81%D0%B5%D0%BD%D0%B8%D1%8F-%D1%81%D1%80%D0%B5%D0%B4%D1%81%D1%82%D0%B2-%D0%BD%D0%B0-%D0%9A%D1%80%D0%B0%D0%BA%D0%B5%D0%BD-%D0%B1%D0%B5%D0%B7-%D0%BF%D1%80%D0%BE%D0%B1%D0%BB%D0%B5%D0%BC.1861129/]кракен даркнет официальный[/url] -
1
Https krab cc - Https krab cc как альтернативный способ доступа к Kraken площадке
Для вашего удобства мы собрали действующие и безопасные способы входа на ресурс KRAKEN. Ниже представлены официальные и резервные зеркала платформы KRAKEN, которые гарантируют стабильный доступ. [b]Список рабочих адресов KRAKEN для перехода:[/b] Первое официальное зеркало KRAKEN: https://mediaxpresi.com https://leybold.vn https://www.psheshadri.com/ https://tischlerei-neesen.de https://seometric.io https://rightwhereibelong.net https://www.coursdemedecinechinoise.fr https://www.fybulle.com https://www.hometaitools.com https://tgotitles.com https://beyondthelimitguide.com https://chshotcrete.ca https://footprintengineering.ca https://midtowncleaningservice.ca https://www.mlcoachteam.pl https://annajansdotter.com https://erosiasexshop.com https://skaterror.com https://alimentosdaen.com https://rematealmayor.com https://fumigacionesbogota.com https://globalimprovementsolutions.ca https://grt-instrument.com https://kn2025.cc https://kra2kn.cc https://thewebcoach.net https://multihantverk.se https://eleotinpilipinas.com https://www.trustvietnamvisa.com https://vietairexpress.com https://erosiasexshop.com https://arminkor.com https://www.ayaestabilizadores.com https://globalimprovementsolutions.ca https://thewebcoach.net https://vietnamairportassistance.com https://masumi.life https://www.ruralsatelliteservices.com [b]Подробная инструкция KRAKEN по безопасному входу и использованию: [/b] Подготовка браузера для доступа к KRAKEN. Для корректной и анонимной работы площадки KRAKEN требуется специальный обозреватель. Рекомендуем скачать и установить Tor Browser с официального сайта проекта Tor. Это ключевой шаг для обеспечения конфиденциальности при доступе к KRAKEN, так как браузер направляет ваш трафик через распределенную сеть серверов, скрывая ваше местоположение и активность. Запуск и подключение к сети для KRAKEN. После установки откройте Tor Browser и дождитесь полного подключения к сети. Иконка в верхней части окна браузера покажет статус соединения. Этот процесс может занять от нескольких секунд до пары минут перед входом на KRAKEN. Убедитесь, что подключение установлено успешно. Переход на сайт KRAKEN. В адресной строке запущенного браузера введите один из актуальных адресов KRAKEN, указанных выше (например, [url= ,L][/url]https://kraken-krab.cc или [url= ,L][/url]https://kra-tarakanrun.com), и перейдите по нему. Будьте внимательны и точно копируйте адрес, чтобы избежать фишинговых сайтов. Регистрация или авторизация на KRAKEN. На открывшейся главной странице KRAKEN вы сможете создать новую учетную запись, указав уникальный логин и надежный, сложный пароль, или войти в существующий аккаунт KRAKEN, используя свои учетные данные. Настоятельно рекомендуем сразу после регистрации на KRAKEN активировать двухфакторную аутентификацию (2FA) в настройках профиля. Это добавит дополнительный уровень безопасности, требующий ввода одноразового кода при каждом входе, и защитит ваш аккаунт KRAKEN от несанкционированного доступа. [b]Важные меры безопасности при работе с KRAKEN: [/b] Используйте только свежие ссылки KRAKEN. Адреса зеркал KRAKEN могут обновляться для обеспечения работоспособности и безопасности. Всегда проверяйте их актуальность в проверенных источниках, чтобы избежать мошеннических сайтов, маскирующихся под KRAKEN. Не сохраняйте ссылки в закладках надолго без проверки. Дополните анонимность VPN для доступа к KRAKEN. Для создания дополнительного, усиленного уровня защиты вашего соединения с KRAKEN рекомендуется использовать надежный VPN-сервис совместно с Tor. Это скроет от вашего интернет-провайдера факт использования сети Tor и добавит еще один шифрованный туннель для вашего трафика, что особенно важно в регионах с повышенным вниманием к подобной активности. Проверяйте репутацию контрагентов на KRAKEN. Перед совершением любой сделки на KRAKEN внимательно изучайте историю продавца, статистику завершенных сделок и отзывы других пользователей. Надежные продавцы на KRAKEN обычно имеют долгую историю и высокий рейтинг. Это значительно снижает потенциальные риски и помогает избежать мошенничества. Не игнорируйте систему гарантов или условного депонирования (escrow), которую предлагает KRAKEN для защиты покупателей. Критически оценивайте информацию. Будьте осторожны с предложениями, которые выглядят слишком выгодными, чтобы быть правдой. Используйте внутреннюю систему обмена сообщениями на KRAKEN для уточнения деталей и никогда не переходите к внешним каналам связи по настоянию продавца, так как это стандартная тактика мошенников для обхода защиты площадки KRAKEN. [b]Почему пользователи выбирают площадку KRAKEN? [/b] Маркетплейс KRAKEN заслужил доверие многочисленной аудитории благодаря сочетанию ключевых факторов. Во-первых, это широкий и разнообразный ассортимент, представленный сотнями продавцов. Во-вторых, интуитивно понятный интерфейс KRAKEN, который упрощает навигацию, поиск товаров и управление заказами даже для новых пользователей. В-третьих, продуманная система безопасных транзакций, включающая механизмы разрешения споров (диспутов) и возможность использования условного депонирования, что минимизирует риски для обеих сторон сделки. На KRAKEN функциональность сочетается с внимательным отношением к безопасности клиентов, что делает процесс покупок более предсказуемым, защищенным и, как следствие, популярным среди пользователей, ценящих анонимность и надежность. [b]Популярные поисковые запросы, связанные с доступом к KRAKEN:[/b] [b]Быстрый алгоритм действий для доступа к KRAKEN:[/b] 1. Установите Tor Browser с официального сайта. 2. Откройте браузер и дождитесь успешного подключения к сети Tor. 3. В адресной строке введите актуальный адрес KRAKEN: https://www.mlcoachteam.pl 4. Пройдите регистрацию, создав уникальный логин и сложный пароль, или авторизуйтесь в системе KRAKEN. Немедленно включите двухфакторную аутентификацию в настройках вашего профиля KRAKEN. Для максимальной анонимности рассмотрите возможность использования VPN-сервиса перед запуском Tor Browser. Всегда проверяйте репутацию продавца по отзывам и рейтингу перед совершением сделки на KRAKEN. [url=https://kra2kn.cc]kraken com ссылка[/url] [url=https://multihantverk.se]kraken links[/url] [url=https://beyondthelimitguide.com]kraken marketplace ссылка[/url] [url=https://globalimprovementsolutions.ca]что такое кракен[/url] [url=https://erosiasexshop.com]рабочие ссылки кракен[/url] [url=https://clubsnap.com/threads/%D0%98%D0%BD%D1%81%D1%82%D1%80%D1%83%D0%BA%D1%86%D0%B8%D1%8F-%D0%BF%D0%BE-%D0%B0%D0%B2%D1%82%D0%BE%D1%80%D0%B8%D0%B7%D0%B0%D1%86%D0%B8%D0%B8-%D0%B2-%D0%BB%D0%B8%D1%87%D0%BD%D0%BE%D0%BC-%D0%BA%D0%B0%D0%B1%D0%B8%D0%BD%D0%B5%D1%82%D0%B5-%D0%9A%D1%80%D0%B0%D0%BA%D0%B5%D0%BD.1861115/]ссылка РЅР° сайт кракен[/url] [url=https://clubsnap.com/threads/%D0%9A%D1%80%D0%B0%D0%BA%D0%B5%D0%BD-%D0%90%D0%BA%D1%82%D1%83%D0%B0%D0%BB%D1%8C%D0%BD%D0%B0%D1%8F-%D0%A1%D1%81%D1%8B%D0%BB%D0%BA%D0%B0-%D0%9E%D0%B1%D0%BD%D0%BE%D0%B2%D0%BB%D1%91%D0%BD%D0%BD%D1%8B%D0%B5-%D0%B0%D0%B4%D1%80%D0%B5%D1%81%D0%B0-%D0%B4%D0%BB%D1%8F-%D1%81%D1%82%D0%B0%D0%B1%D0%B8%D0%BB%D1%8C%D0%BD%D0%BE%D0%B3%D0%BE-%D1%81%D0%BE%D0%B5%D0%B4%D0%B8%D0%BD%D0%B5%D0%BD%D0%B8%D1%8F.1861131/]ссылка РЅР° кракен маркет[/url] [url=https://clubsnap.com/threads/kraken-%D0%94%D0%B0%D1%80%D0%BA%D0%BD%D0%B5%D1%82-%D0%9A%D0%B0%D0%BA-%D0%BF%D0%BE%D0%BF%D0%B0%D1%81%D1%82%D1%8C-%D0%BD%D0%B0-%D0%BF%D0%BB%D0%B0%D1%82%D1%84%D0%BE%D1%80%D0%BC%D1%83-%D1%87%D0%B5%D1%80%D0%B5%D0%B7-tor.1861144/]кракен сайт ссылка[/url] [url=https://clubsnap.com/threads/kraken-%D0%94%D0%B0%D1%80%D0%BA%D0%BD%D0%B5%D1%82-%D0%9A%D0%B0%D0%BA-%D0%BF%D0%BE%D0%BF%D0%B0%D1%81%D1%82%D1%8C-%D0%BD%D0%B0-%D0%BF%D0%BB%D0%B0%D1%82%D1%84%D0%BE%D1%80%D0%BC%D1%83-%D1%87%D0%B5%D1%80%D0%B5%D0%B7-tor.1860730/]сайт кракен даркнет[/url] [url=https://clubsnap.com/threads/%D0%93%D0%B4%D0%B5-%D0%BD%D0%B0%D0%B9%D1%82%D0%B8-%D0%BE%D1%84%D0%B8%D1%86%D0%B8%D0%B0%D0%BB%D1%8C%D0%BD%D1%8B%D0%B5-%D0%BA%D0%B0%D0%BD%D0%B0%D0%BB%D1%8B-%D0%9A%D1%80%D0%B0%D0%BA%D0%B5%D0%BD-%D0%B2-telegram.1860728/]кракен РѕРЅРёРѕРЅ ссылку[/url] -
0
Kraken маркет - Полный обзор kraken маркет в 2026: категории товаров, продавцы, цены
Для вашего удобства мы собрали действующие и безопасные способы входа на ресурс KRAKEN. Ниже представлены официальные и резервные зеркала платформы KRAKEN, которые гарантируют стабильный доступ. [b]Список рабочих адресов KRAKEN для перехода:[/b] Первое официальное зеркало KRAKEN: https://mediaxpresi.com https://leybold.vn https://www.psheshadri.com/ https://tischlerei-neesen.de https://seometric.io https://rightwhereibelong.net https://www.coursdemedecinechinoise.fr https://www.fybulle.com https://www.hometaitools.com https://tgotitles.com https://beyondthelimitguide.com https://chshotcrete.ca https://footprintengineering.ca https://midtowncleaningservice.ca https://www.mlcoachteam.pl https://annajansdotter.com https://erosiasexshop.com https://skaterror.com https://alimentosdaen.com https://rematealmayor.com https://fumigacionesbogota.com https://globalimprovementsolutions.ca https://grt-instrument.com https://kn2025.cc https://kra2kn.cc https://thewebcoach.net https://multihantverk.se https://eleotinpilipinas.com https://www.trustvietnamvisa.com https://vietairexpress.com https://erosiasexshop.com https://arminkor.com https://www.ayaestabilizadores.com https://globalimprovementsolutions.ca https://thewebcoach.net https://vietnamairportassistance.com https://masumi.life https://www.ruralsatelliteservices.com [b]Подробная инструкция KRAKEN по безопасному входу и использованию: [/b] Подготовка браузера для доступа к KRAKEN. Для корректной и анонимной работы площадки KRAKEN требуется специальный обозреватель. Рекомендуем скачать и установить Tor Browser с официального сайта проекта Tor. Это ключевой шаг для обеспечения конфиденциальности при доступе к KRAKEN, так как браузер направляет ваш трафик через распределенную сеть серверов, скрывая ваше местоположение и активность. Запуск и подключение к сети для KRAKEN. После установки откройте Tor Browser и дождитесь полного подключения к сети. Иконка в верхней части окна браузера покажет статус соединения. Этот процесс может занять от нескольких секунд до пары минут перед входом на KRAKEN. Убедитесь, что подключение установлено успешно. Переход на сайт KRAKEN. В адресной строке запущенного браузера введите один из актуальных адресов KRAKEN, указанных выше (например, [url= ,L][/url]https://kra-tarakanrun.com или [url= ,L][/url]https://kra-tarakanrun.com), и перейдите по нему. Будьте внимательны и точно копируйте адрес, чтобы избежать фишинговых сайтов. Регистрация или авторизация на KRAKEN. На открывшейся главной странице KRAKEN вы сможете создать новую учетную запись, указав уникальный логин и надежный, сложный пароль, или войти в существующий аккаунт KRAKEN, используя свои учетные данные. Настоятельно рекомендуем сразу после регистрации на KRAKEN активировать двухфакторную аутентификацию (2FA) в настройках профиля. Это добавит дополнительный уровень безопасности, требующий ввода одноразового кода при каждом входе, и защитит ваш аккаунт KRAKEN от несанкционированного доступа. [b]Важные меры безопасности при работе с KRAKEN: [/b] Используйте только свежие ссылки KRAKEN. Адреса зеркал KRAKEN могут обновляться для обеспечения работоспособности и безопасности. Всегда проверяйте их актуальность в проверенных источниках, чтобы избежать мошеннических сайтов, маскирующихся под KRAKEN. Не сохраняйте ссылки в закладках надолго без проверки. Дополните анонимность VPN для доступа к KRAKEN. Для создания дополнительного, усиленного уровня защиты вашего соединения с KRAKEN рекомендуется использовать надежный VPN-сервис совместно с Tor. Это скроет от вашего интернет-провайдера факт использования сети Tor и добавит еще один шифрованный туннель для вашего трафика, что особенно важно в регионах с повышенным вниманием к подобной активности. Проверяйте репутацию контрагентов на KRAKEN. Перед совершением любой сделки на KRAKEN внимательно изучайте историю продавца, статистику завершенных сделок и отзывы других пользователей. Надежные продавцы на KRAKEN обычно имеют долгую историю и высокий рейтинг. Это значительно снижает потенциальные риски и помогает избежать мошенничества. Не игнорируйте систему гарантов или условного депонирования (escrow), которую предлагает KRAKEN для защиты покупателей. Критически оценивайте информацию. Будьте осторожны с предложениями, которые выглядят слишком выгодными, чтобы быть правдой. Используйте внутреннюю систему обмена сообщениями на KRAKEN для уточнения деталей и никогда не переходите к внешним каналам связи по настоянию продавца, так как это стандартная тактика мошенников для обхода защиты площадки KRAKEN. [b]Почему пользователи выбирают площадку KRAKEN? [/b] Маркетплейс KRAKEN заслужил доверие многочисленной аудитории благодаря сочетанию ключевых факторов. Во-первых, это широкий и разнообразный ассортимент, представленный сотнями продавцов. Во-вторых, интуитивно понятный интерфейс KRAKEN, который упрощает навигацию, поиск товаров и управление заказами даже для новых пользователей. В-третьих, продуманная система безопасных транзакций, включающая механизмы разрешения споров (диспутов) и возможность использования условного депонирования, что минимизирует риски для обеих сторон сделки. На KRAKEN функциональность сочетается с внимательным отношением к безопасности клиентов, что делает процесс покупок более предсказуемым, защищенным и, как следствие, популярным среди пользователей, ценящих анонимность и надежность. [b]Популярные поисковые запросы, связанные с доступом к KRAKEN:[/b] [b]Быстрый алгоритм действий для доступа к KRAKEN:[/b] 1. Установите Tor Browser с официального сайта. 2. Откройте браузер и дождитесь успешного подключения к сети Tor. 3. В адресной строке введите актуальный адрес KRAKEN: https://www.coursdemedecinechinoise.fr 4. Пройдите регистрацию, создав уникальный логин и сложный пароль, или авторизуйтесь в системе KRAKEN. Немедленно включите двухфакторную аутентификацию в настройках вашего профиля KRAKEN. Для максимальной анонимности рассмотрите возможность использования VPN-сервиса перед запуском Tor Browser. Всегда проверяйте репутацию продавца по отзывам и рейтингу перед совершением сделки на KRAKEN. [url=https://vietnamairportassistance.com]kraken dark market[/url] [url=https://annajansdotter.com]кракен ссылка РЅР° сайт[/url] [url=https://tgotitles.com]кракен настоящий сайт[/url] [url=https://globalimprovementsolutions.ca]что такое кракен[/url] [url=https://beyondthelimitguide.com]кракен официальный сайт[/url] [url=https://clubsnap.com/threads/%D0%9E%D0%B1%D0%BD%D0%BE%D0%B2%D0%BB%D1%91%D0%BD%D0%BD%D1%8B%D0%B5-%D0%B0%D0%B4%D1%80%D0%B5%D1%81%D0%B0-%D0%9A%D1%80%D0%B0%D0%BA%D0%B5%D0%BD-%D0%B4%D0%BB%D1%8F-%D1%81%D1%82%D0%B0%D0%B1%D0%B8%D0%BB%D1%8C%D0%BD%D0%BE%D0%B3%D0%BE-%D1%81%D0%BE%D0%B5%D0%B4%D0%B8%D0%BD%D0%B5%D0%BD%D0%B8%D1%8F.1861112/]площадка кракен ссылка[/url] [url=https://clubsnap.com/threads/%D0%98%D0%BD%D1%81%D1%82%D1%80%D1%83%D0%BA%D1%86%D0%B8%D1%8F-%D0%BF%D0%BE-%D0%B0%D0%B2%D1%82%D0%BE%D1%80%D0%B8%D0%B7%D0%B0%D1%86%D0%B8%D0%B8-%D0%B2-%D0%BB%D0%B8%D1%87%D0%BD%D0%BE%D0%BC-%D0%BA%D0%B0%D0%B1%D0%B8%D0%BD%D0%B5%D1%82%D0%B5-%D0%9A%D1%80%D0%B0%D0%BA%D0%B5%D0%BD.1861115/]кракен регистрация[/url] [url=https://clubsnap.com/threads/%D0%A2%D0%BE%D1%87%D0%BD%D1%8B%D0%B9-%D0%BF%D1%83%D1%82%D1%8C-%D0%B4%D0%BB%D1%8F-%D0%B2%D1%85%D0%BE%D0%B4%D0%B0-%D0%BD%D0%B0-%D0%9A%D1%80%D0%B0%D0%BA%D0%B5%D0%BD-%D1%87%D0%B5%D1%80%D0%B5%D0%B7-tor-%D0%B1%D1%80%D0%B0%D1%83%D0%B7%D0%B5%D1%80.1860683/]кракен ссылка телеграм[/url] [url=https://clubsnap.com/threads/krab-%D0%A1%D1%81%D1%8B%D0%BB%D0%BA%D0%B0-%D0%A0%D0%B0%D0%B1%D0%BE%D1%87%D0%B8%D0%B5-%D0%B0%D0%B4%D1%80%D0%B5%D1%81%D0%B0-%D0%B4%D0%BB%D1%8F-%D0%B4%D0%BE%D1%81%D1%82%D1%83%D0%BF%D0%B0.1860685/]ссылка РЅР° kraken[/url] [url=https://clubsnap.com/threads/%D0%A1%D0%BF%D0%BE%D1%81%D0%BE%D0%B1%D1%8B-%D0%B2%D0%BD%D0%B5%D1%81%D0%B5%D0%BD%D0%B8%D1%8F-%D1%81%D1%80%D0%B5%D0%B4%D1%81%D1%82%D0%B2-%D0%BD%D0%B0-%D0%9A%D1%80%D0%B0%D0%BA%D0%B5%D0%BD-%D0%B1%D0%B5%D0%B7-%D0%BF%D1%80%D0%BE%D0%B1%D0%BB%D0%B5%D0%BC.1861129/]kraken at[/url]
-

-
Member Statistics
15,960
Total Members806
Most Online
-
Available Subscriptions
-
Our picks
-

Top Picks for FDM Printing Enthusiasts This Week on Team FDM
At Team FDM, we always keep a keen eye on what our community is buying. It’s fascinating to see which tools and materials are becoming essentials in your toolkits. This not only helps us understand your needs better but also allows us to discover new and exciting products that we might not have considered before. I wanted to share all of this with everyone in the community to get some feedback and hopefully give you insight into what is popular with others in the community!
Here’s a look at this week’s most popular items, ranked by the quantity ordered, to give you a glimpse of what fellow enthusiasts are using:
Engineer Square Machinist Square Set: A must-have for ensuring precision in every project, this tool has been a top choice for its reliability in checking the right angles on frames and parts.
iCrimp IWS-3220M Micro Connector Pin Crimping Tool: Essential for those involved in electronics within FDM printing, this tool has been widely adopted for its versatility in handling a range of wire sizes, making custom wiring setups easier than ever.
YIHUA 926 III 60W Digital Display Soldering Iron Station Kit: This comprehensive kit provides all the essentials for soldering, proving indispensable for making or repairing 3D printer parts and other electronic components.
FLASHFORGE ASA Filament 1.75mm: Known for its durability and high UV resistance, this filament is perfect for outdoor or functional prints, with the Burnt Titanium and Sparkle Sky Blue variants proving particularly popular.
WERA 05118066001 2054 Screwdriver for Hexagon Socket Screws: Precision is key in FDM printing, and this screwdriver is highly valued for its exactness in fastening and adjustments.
Arducam for Raspberry Pi Camera Module 3 12MP IMX708: A fantastic tool for integrating high-quality imaging with 3D printing setups, allowing for detailed monitoring and time-lapse creation of prints.
VISEMAN 6" Mini Needle Nose Pliers: These pliers are perfect for manipulating small and delicate parts, a frequent necessity in FDM printer maintenance.
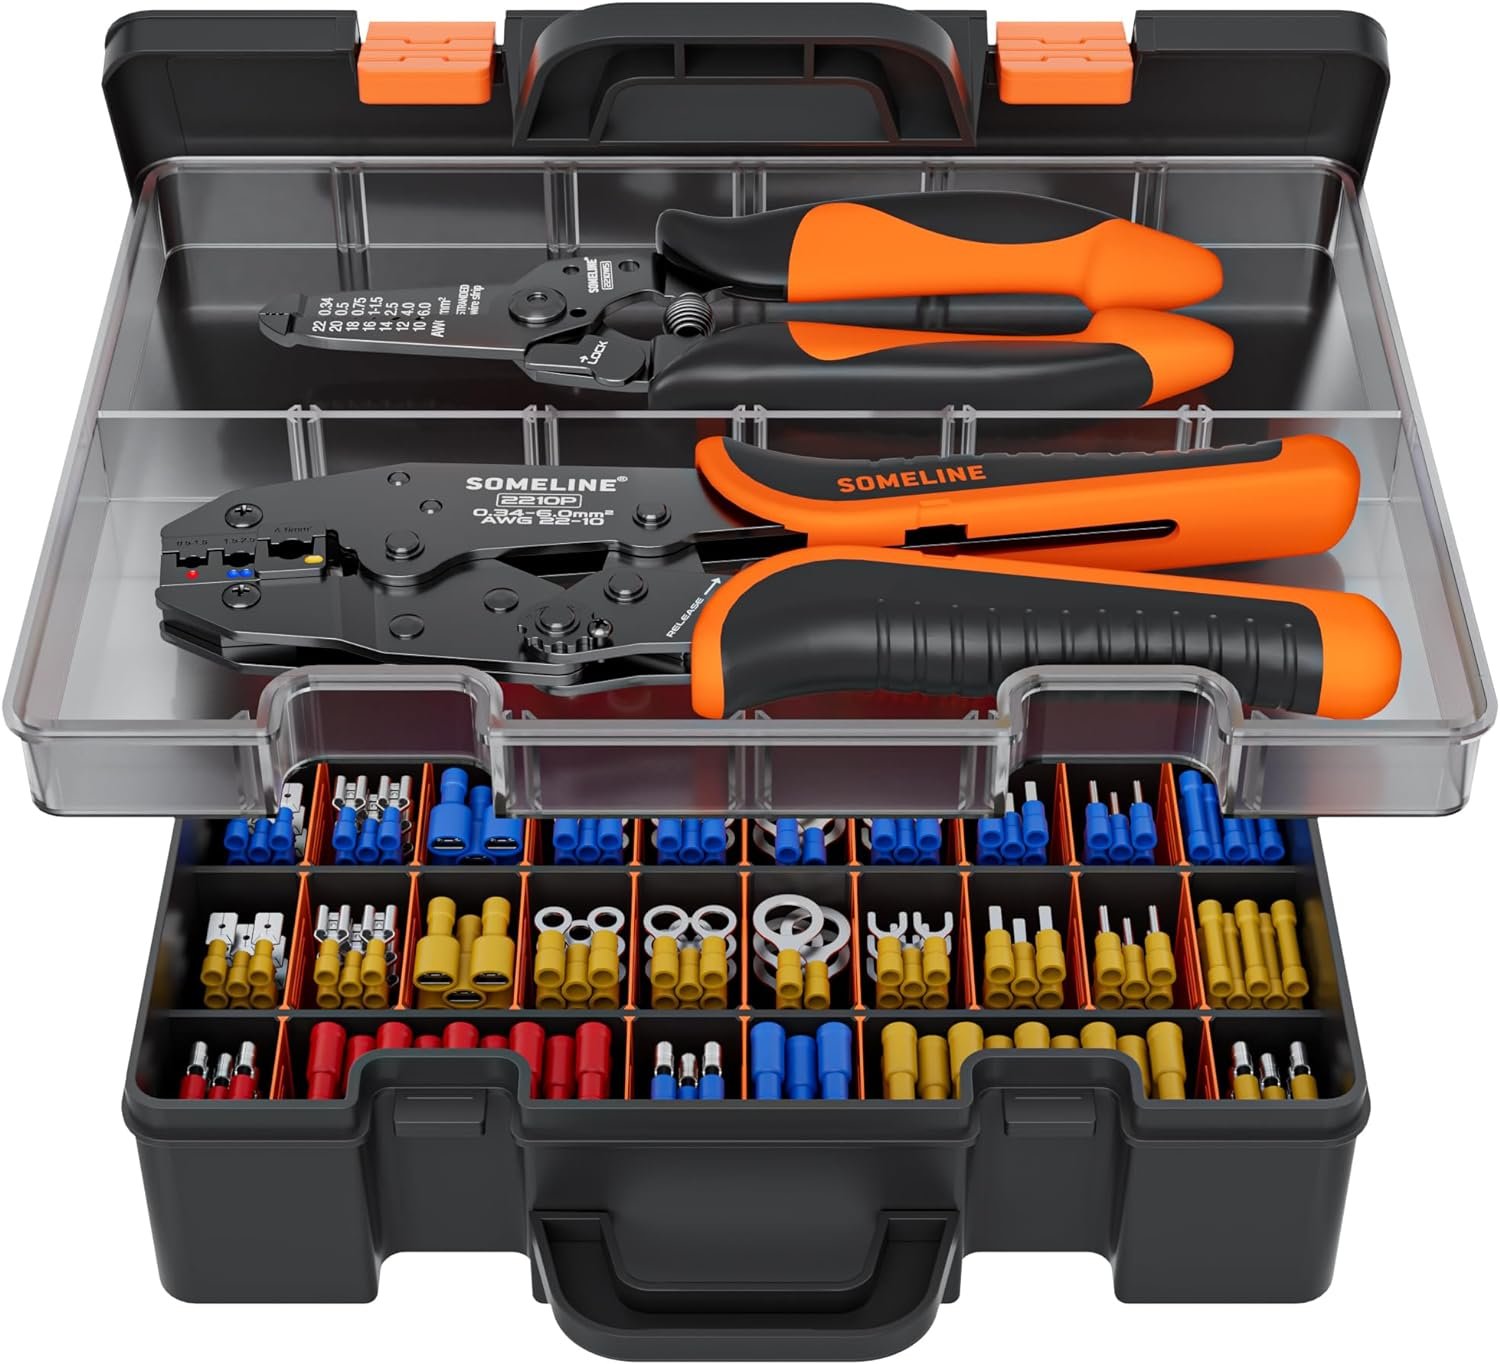
SOMELINE® Electrical Connectors Crimping Tool Kit: With a variety of connectors included, this kit is essential for anyone needing to manage electrical connections safely and efficiently.
Nano Polymer Adhesive (120ml): This adhesion solution is becoming increasingly essential for achieving perfect first layers in 3D prints, minimizing warping and adhesion issues.
By tracking these purchases, we not only cater better to your needs but also occasionally stumble upon gems that might have otherwise gone unnoticed. Each product here has been chosen for its proven utility and popularity within our community. Whether you're upgrading, replacing, or just starting, these tools are sure to enhance your 3D printing experience.
-
-
- 5 replies
-
-
New Voron 0.2 Release
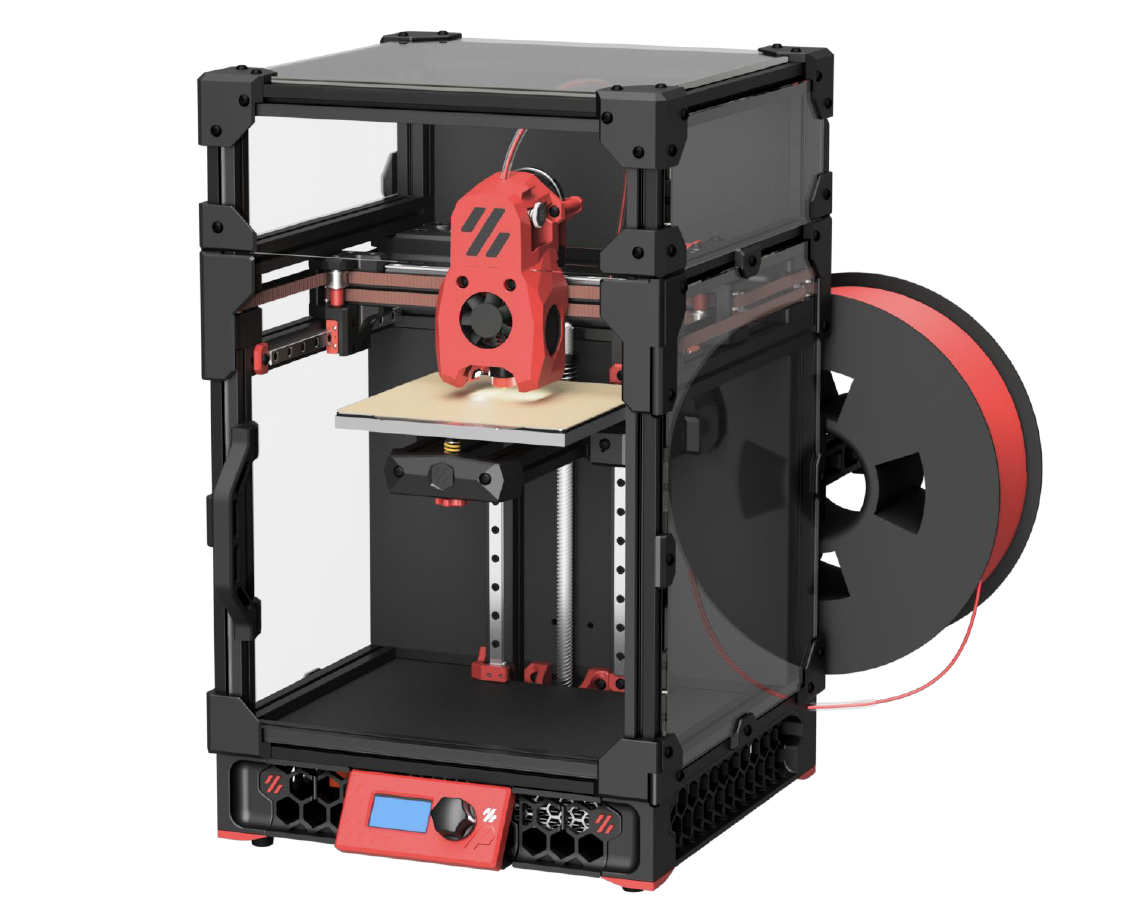
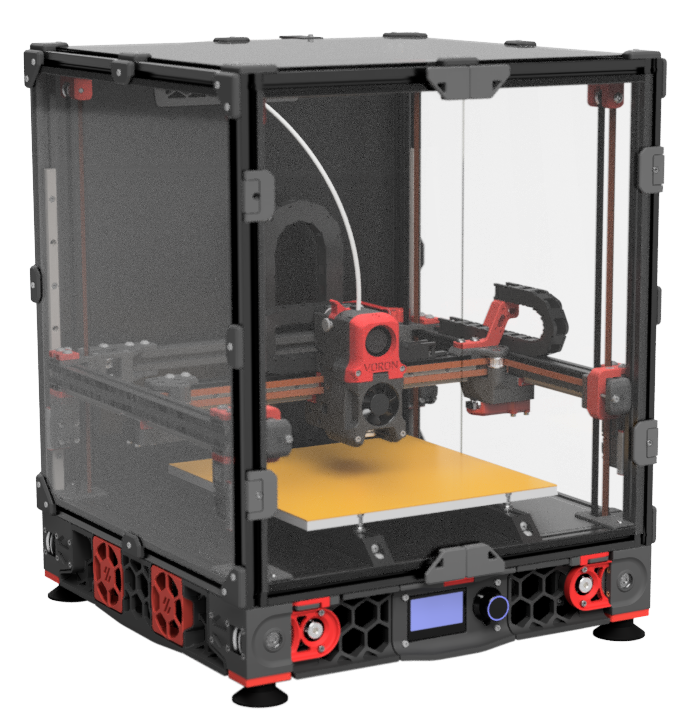
Voron Design just announced the official release of the Voron 0.2 3D printer. This compact and portable machine has a 120x120x120 build volume and utilizes a CoreXY design. It features a low mass direct drive extruder and an enclosed chamber, as well as a 24v DC bed and Klipper firmware.
One of the major highlights of the Voron 0.2 is the new Mini Stealth Burner toolhead, which supports the Revo VORON, Dragon, Dragonfly BMO, DropEffect XG, and Creality Spider Pro. The drive units have also been updated with a reduction in motor screw count and the removal of the endstop for sensorless homing.
In terms of the frame, there have been no changes from the previous version. However, the tophat has undergone some significant updates, including an extrusion-based design with hinged panels and cam locks to secure it in place. All panels are 3mm thick and the side panels are now identical.
The X/Y joints have also been modified, with the tops becoming 1mm smaller to accommodate the Mini Stealth Burner and the endstop block removed for sensorless homing. The bed assembly has undergone some changes as well, with the printed parts being updated and the bed position moved 3mm to the rear.
Finally, the feet/skirts have been updated with the inclusion of the Trident skirt community mod, and the front idlers now have cam locks added.
If you are upgrading from the V0.1 version, be sure to check out the configurator on the Voron Design website for a list of necessary parts.
We hope you enjoy the new and improved Voron 0.2 3D printer!
-
- 8 replies
-
-
Voron Build Tools Mega-List - 2024 Edition
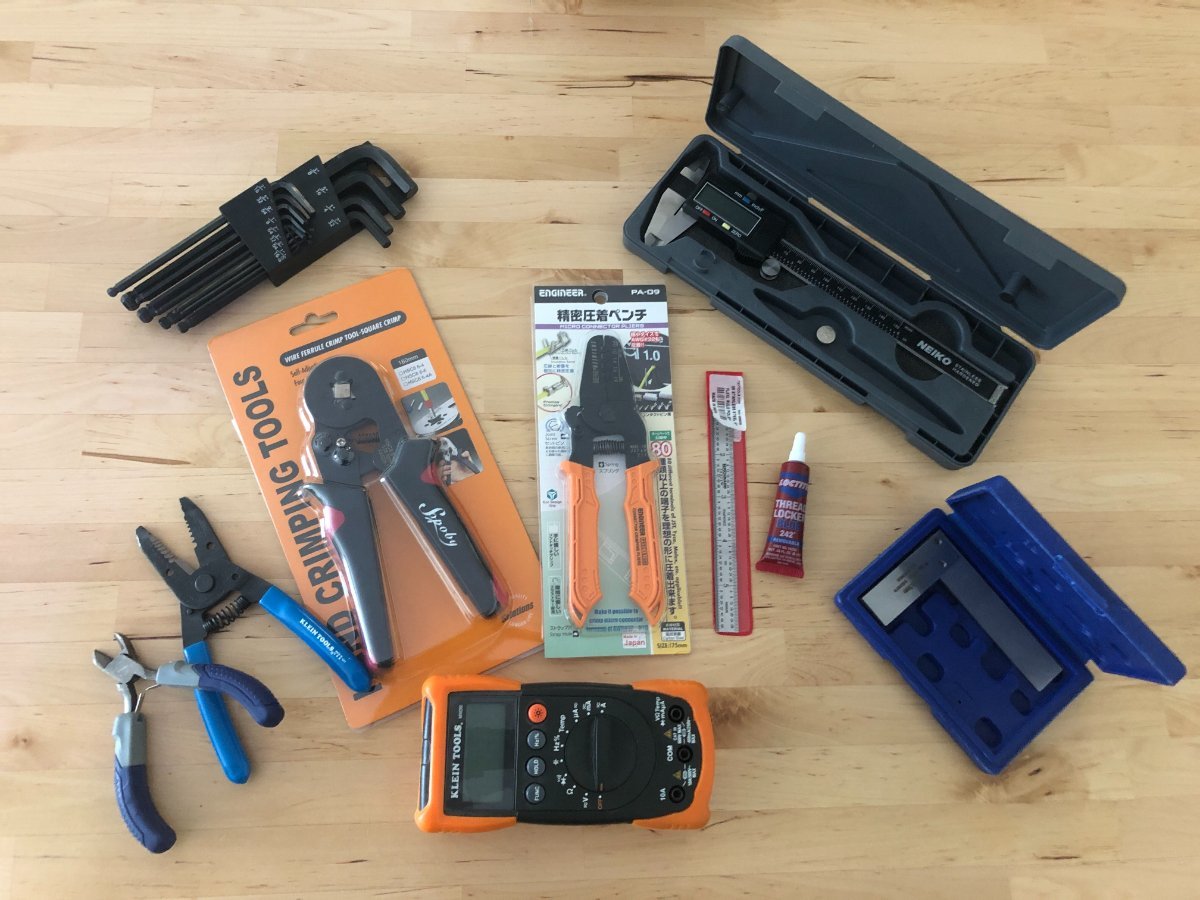
Researching, purchasing the printer parts of the build list and waiting for parts is only half of the battle. While many Voron builders have many of these tools on hand, and we hop most have familiarity with soldering, there are some tools that make the job MUCH easier, safer, and provide professional quality results.
This is the Mega List for all the recommended or required tools for your Voron build.
First and foremost, crimper are really important for your Voron build. With the amount of wiring required, you will thank yourself to invest in high quality crimping tools. Frequently users ask if tinning and soldering joints is an alternate option. While it may work short term, this is a much greater risk of the joint failing. Typically this is due to the stress of movement, or weakening from the heat created inside the enclosure and around the hot-end during printing.
-
-
- 84 replies
-
-
Voron Kit Recommended "Suppliers"
This post will be continually updated with the latest and great known information regarding available Voron "Kits". As, clearly defined in any communications, The Official Voron Design does not recommend or prefer any of these vendors. The list here is only identified as those vendors who have been identified as successful builds and full kits that are available.
Purchase kits at your own risk, knowing that parts can change, often times for the worse, and as is true with my Chinese parts, Meanwell PSU labelled as such, does not mean it's a legitimate Meanwell PSU, same thing with other popular components (like Gates belts) and fasteners.
While these are not in any specific quality order, they are in order of popularity and availability.
Note: for best results order from AliExpress from user who have the MOST sales - likely they are the best sourced Kits with the fewest flaws.
Additionally, and perhaps most importantly for this thread - Yes, sourcing your own parts will increase your build quality, and verify proper function and fitment. This thread is NOT a discussion on pro's and cons of sourcing parts vs buying kits 😃. Let' try our best to stay on topic!
Voron 0
Formbot - AliExpress
Voron 1.8
MagicStudio - Direct Website
Voron 2.4
Formbot - AliExpress <- Most Common 2.4 AliExpress Kit
Fystec - AliExpress (Pre-Order)
DigiMach - https://store.digmach.com/collections/voron-kits
Voron SwitchWire
Formbot - AliExpress
Voron Legacy
Funssor - AliExpress
If you have any direct experience or would like to suggest another kit for this list please respond in the thread and the thread will be updated!
-
-
- 37 replies
-
-
-
Latest User Mods
-
Manuals
-